This is a long retrospective, organized into 3 parts, about my 2023 hike of the Portuguese Camino de Santiago.
- Part 1 is about my preparation, packing and gear
- Part 2 covers a retrospective of insights gained along the way, and advice for anyone else considering the Camino
- And Part 3 is a roll-up of the daily social media posts and accompanying photographs from my two weeks on the trail
Comments are disabled on Blogger due to relentless spam, but you reach me on LinkedIn and Twitter with questions. You're also welcome to follow me on Google Maps, where I contribute frequently and reviewed many of the establishments we visited along this trip. Enjoy!
Part 1: Preparation, Packing, and Gear
I love a good, long walk -- I've had some brilliant hikes across
Scotland,
New Zealand, Peru, Switzerland, and of course throughout Texas and the United States National Parks. I know my limits -- I'm fit enough to easily walk 10-15 miles a day, with a pack, for multiple days in a row. But I also know that I need to be very comfortable in my shoes, and with my pack, and with the right gear. So I spent about 3 weeks walking around my hometown of Austin, Texas, with my pack, "training". I walked about 5-7 miles in my (pretty hilly) neighborhood, almost every day, and did one 10 miler around Lady Bird Lake trail in downtown Austin. I wouldn't call this "training" per se, but I do think it was pretty valuable acclimation to the mileage and additional weight of a backpack.
All in all, I felt very well prepared throughout the actual hike on the Camino.
More importantly, I was generally pleased with the light weight and balance of my pack. With hindsight, are there a few things I would pack differently? You bet. Here's a spreadsheet I used when packing:
See below for a thorough retrospective on my packing and gear.
Disclosure: As an Amazon Associate I earn from qualifying purchases.
Backpack
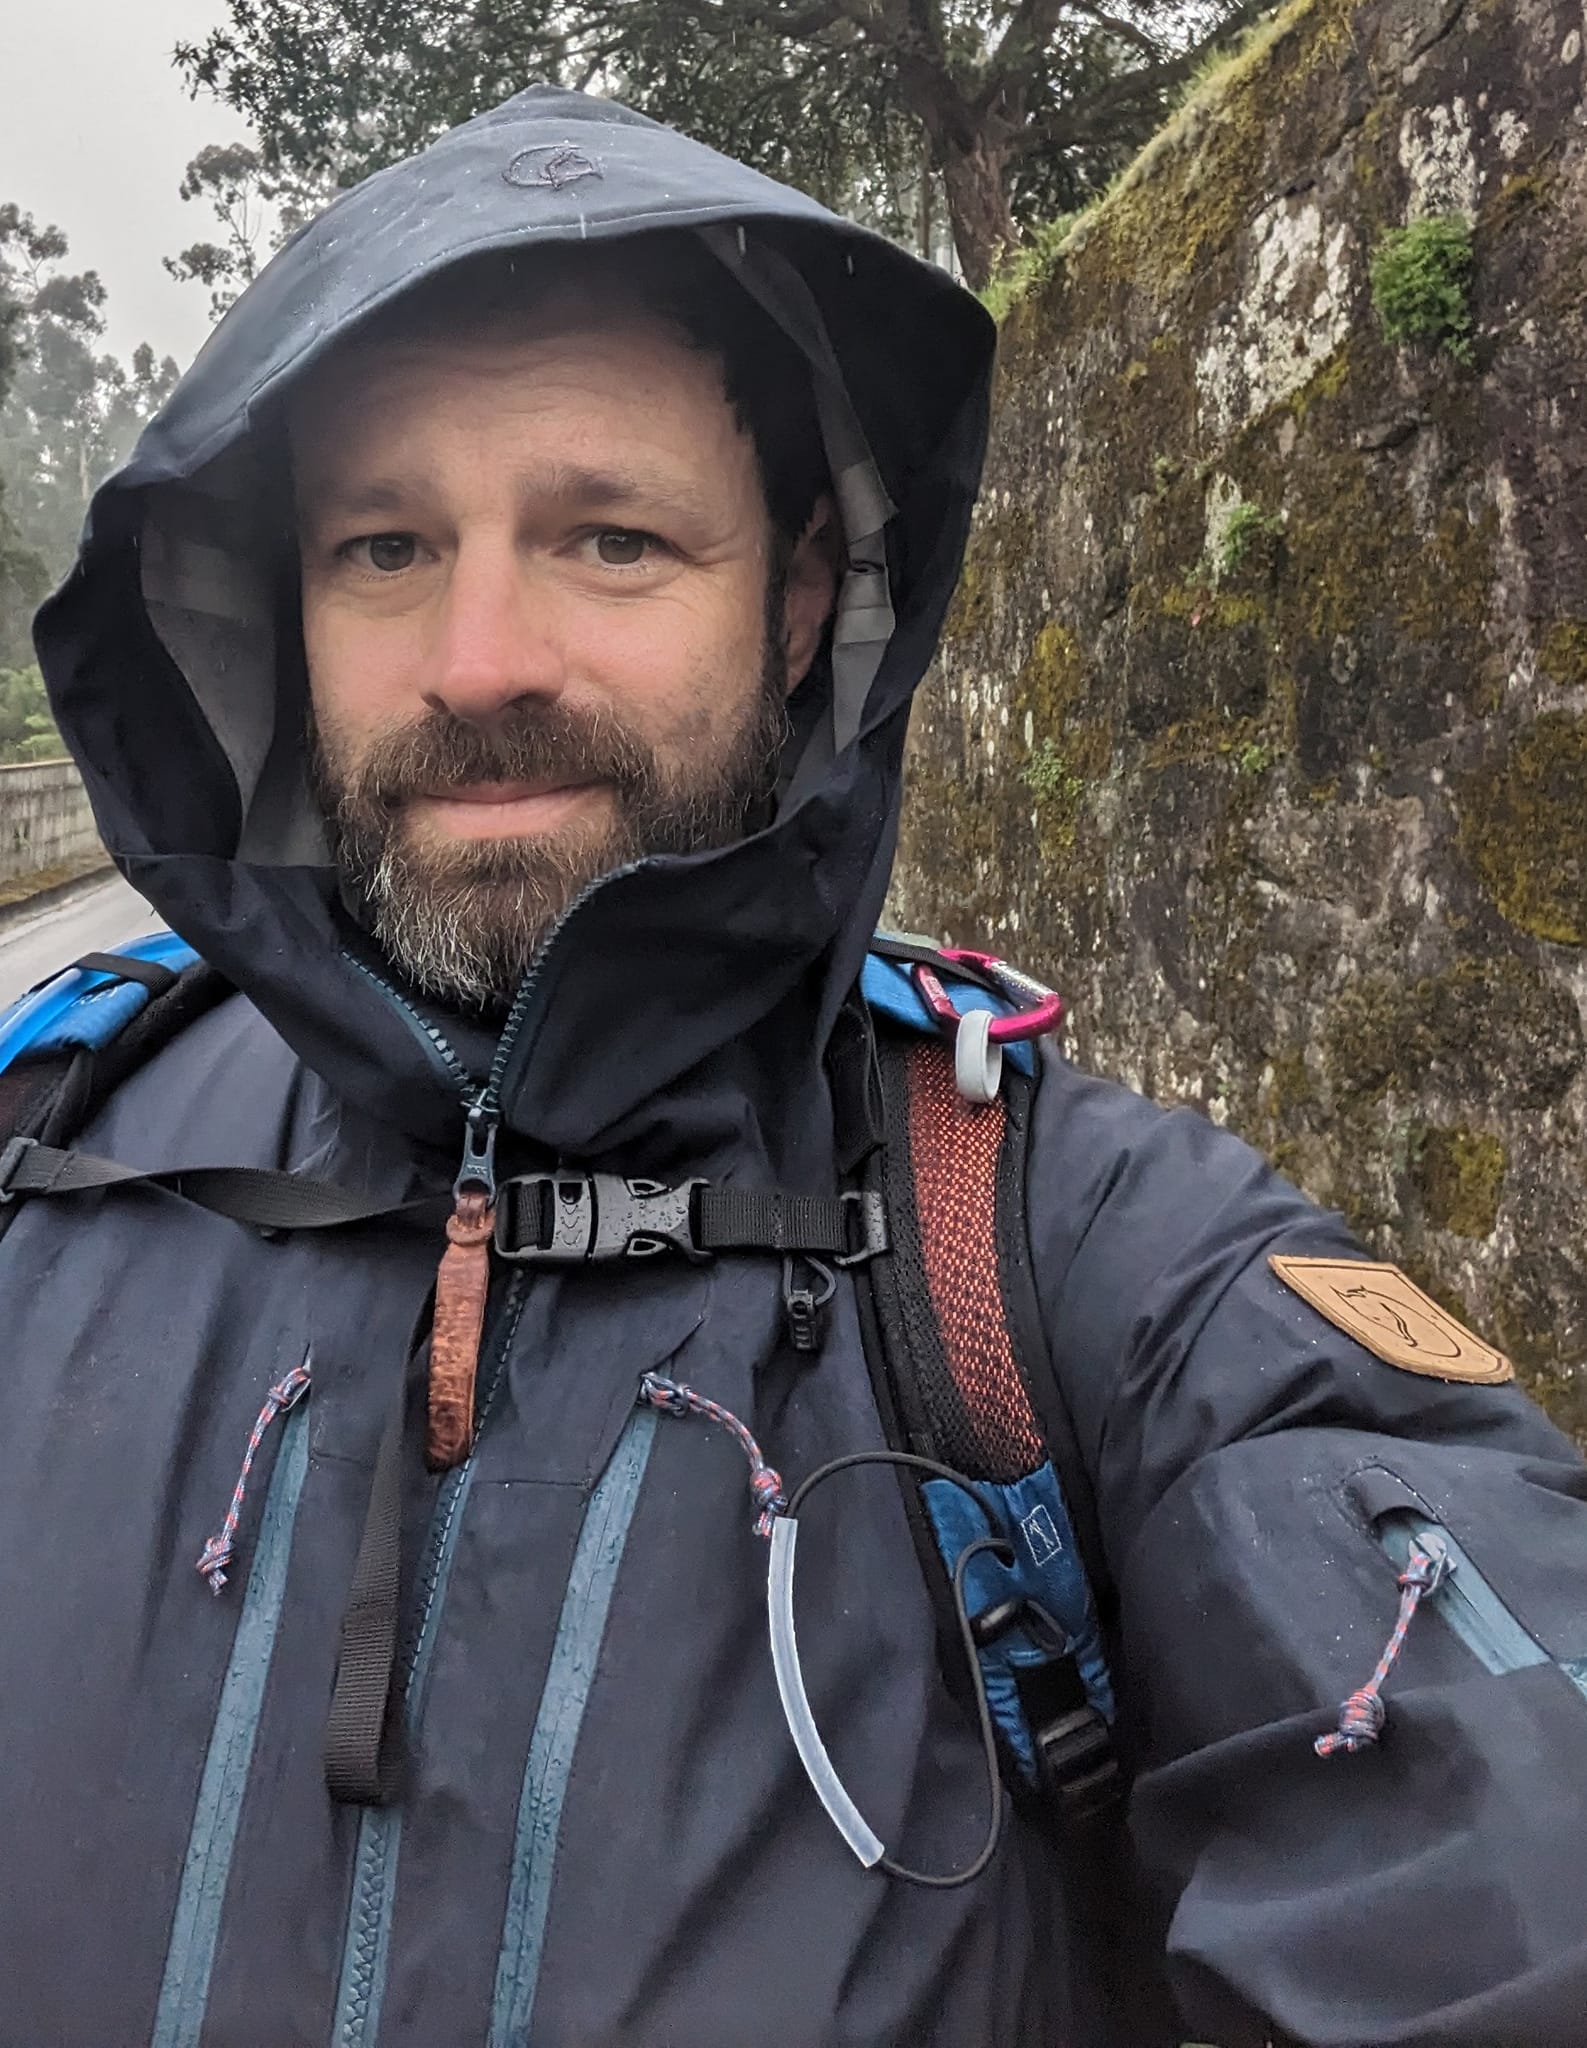
I decided to upgrade my vintage, 20+ year old Gregory Reality backpack, to a brand new, ultralight
Osprey Exos 38L, and that was a great investment! I kept my fully loaded pack to about 18 lbs with an empty water bladder, or 20 lbs with a fully loaded 2L water bladder. That weight was perfect for me. I hardly noticed it at all. I mean, I couldn't "run", but at no point in the 160 miles did I ever even think about the backpack's weight or comfort. It was just part of me. I also brought the
over-pack rain shell, which was useful and necessary a couple of times. For what it's worth, my hiking partner used an
Osprey Stratos 36L and he loved his, too.
Water
My Osprey backpack supported a water bladder, and I carried a
2L Camelbak bladder. It was awesome. I swear by it. It was really nice to sip water along the way, any time, without stopping.
Shoes
In my early Camino prep, I also originally figured I'd take my beloved heavy duty leather
Hanwag hiking boots. However, doing a little bit of research and reading, it seems that all of the distance through hikers these days have moved to using trail running shoes, of which
Hoka Speedgoat and
Altra Lone Peak seem to be by far the most popular. I tried both, and really liked the
Altras better. (I got a pretty good deal by buying last year's model). I treated them with a couple of applications of
Scotch Guard for a little bit of extra water resistance.
REI has both (and some others), and you should probably check them out, if you haven't already. There were plenty of people on the Camino wearing both Hoka and Altra, as well as some Soloman's, a few Brooks, and others. I was quite happy with the Altras, all things said. I ended up with a few blisters on the 18 mile days, but I think that was more a matter of my socks.
Socks
Alternate Pair of Shoes
Without a doubt, you'll also need a second pair of shoes for the afternoon / evening, after you're done hiking. I brought my
Olukai flip flops (which I can easily walk/hike 6+ miles in, no question). I liked flip flops because they were light, and could get wet (I used them in the occasional communal / prison-style showers). My hiking partner used lightweight deck shoes as his 2nd pair and he was happy with that as well. The key point is just that you'll absolutely need something to switch into, after a long day of hiking and you really need something that doesn't require socks.
Clothes
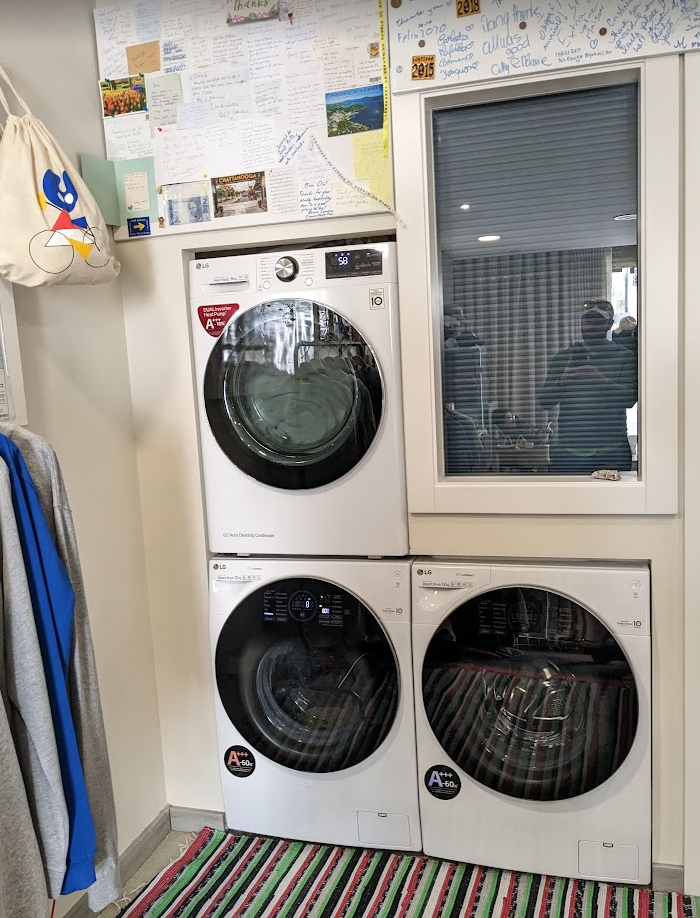
I packed 5 sets of socks, underwear, and shirts (3 long sleeves, 2 shortsleeves), and 3 sets of pants (two long hiking pants, one pair of shorts). We did laundry every 4-5 days. Basically I'd wash 4 sets of clothes, while wearing my last set. Most accommodation has some form of laundry facilities. We chose to use the ones that had both washers and dryers (to get everything done in 90 minutes or so), but most people just hang dry their clothes overnight. Plenty of people travel with just 2 or 3 sets of clothes too, and they do laundry more frequently.
Shirts
The weather was really, really quite perfect for our hike in March/April. Just a bit of chill in the air in the morning (mid 40s-50s Fahrenheit), and warm (high 70s Fahrenheit) most afternoons. As such, I was able to wear long sleeves shirts every day (avoiding some sunscreen on the arms). My go-to shirt for hiking are these
Fjallraven Abisko wool shirts, and the
Fjallraven sun hoodie version. Light, breathable, extraordinarily comfortable. I also brought one
Nike Dri-fit long sleeve zip top, for some variety.
Pants
Most mornings (in March and April for us) were chilly (low 40s F), and the afternoons sunny and warm (high 70s F). I'd start most mornings with 1, 2, or all 3 layers, and then stop about every hour to shed a layer. I liked the long sleeves and long pants (albeit very thin and breathable), even the hottest part of the day, for sun protection. I wore sunscreen on my face and neck every day.
I also brought an pair of
Frog Tog rain shell pants, which, thankfully I never actually used, as we had great weather. I probably could have done without, but on the whole, I'm glad I brought as the weight and space required were negligible.
Hat / Cap / Sunglasses
I also brought a basic baseball cap and
Oakley Frogskins Lite sunglasses. My hiking partner swore by his
full brim hiking hat, but I didn't like how the back of my full brim hat brushed the top of my backpack. So, instead I used a
Fjallraven knit cap/beanie, which was nice a few mornings, but certainly not necessary at all. I typically shed it within the first hour and could have done without it easily.
Tech and Electronics
Charing electronics (phone, watch) was far easier than I expected. I carried a
rechargeable power brick that I never really used and, in hindsight, I didn't need, at all.
My
Google Pixel 6a phone and
Google Pixel watch batteries (both proactively set to power save mode every day), had more than enough battery every day for each day's hike, even with full GPS tracking enabled, lots of pictures, a fair amount of Google maps for restaurant reviews, Google lens for translations, and Wikipedia for learnings.
I also brought a small,
rechargeable Black Diamond headlamp that I totally didn't need either. We only started hiking two days before dawn, and even then there were plenty of street lights. And a phone flashlight would have been plenty enough light. Next time, I wouldn't bother bringing a headlamp.
I did bring a set of
Airpods, planning to listen to music or audiobooks, but surprisingly, I never actually used them for even one minute of music or books! Rather, I enjoyed the conversation with my hiking partner, and the peace and quiet and sounds of the trail. That said, they were still handy for calling home and talking to the family, though, so no regrets on bringing them.
Credit cards were good about 80% of the time (mostly NFC tap-to-pay, conveniently), though I did pull cash (about 100-150 euros, three times), with my
M1 Finance debit card.
Additional Hiking / Camping Gear
The only important thing I neglected to bring, and actually purchased along the way was a hiking pole. Of course I have great
trekking poles at home, but I was unable to find out definitively if I could carry them onto the plane (we definitely did NOT check our backpacks). It sounds like the TSA and airline rules against "blunt force weapons" are sometimes (but very inconsistently) applied to hiking poles and walking sticks? So I did not bring my own, but should have.

As it turns out, I'm sure I totally could have, if I had collapsed it all the way down, and stuffed it entirely inside of the pack, rather than cinching it to the outside where it's visible and accessible. While it's nice to walk with two poles, one is enough, when packing light. After about day three, I was missing a walking stick, and I picked up a wooden one (as did my hiking partner), but it was awkward and hurt my wrist. So I bought one for 15 euros at the first place I saw one for sale. It was nice enough -- collapsible and spring loaded, but certainly not the highest end equipment. It does say "Camino de Santiago" on it, so it's a nice souvenir, and it really helped with the up and down hills on the hike. I had no trouble whatsoever bringing it home on the plane in my carry on backpack, so looking back, I'm sure I could have brought it on very easily.
Regarding Accommodations on the Camino
There's no camping really (maybe just one or two spots), along the Camino, and lodging is readily available, so there's no need for a tent. If you're flexible (quality and cost, in both directions, up and down), you'll never have a problem finding a place to sleep. At the lowest end, there are plenty of first-come, first-serve, free (or nearly free, with a nominal "donation" of 10 euros or so), public "Albergues". These are basically hostels, with 30 or more bunk beds in a room, and communal bathrooms and showers. It's meager accommodations, usually in an old monastery or similar historic building. This is the very "traditional" Camino experience.
Similarly, there are also "private" Albergues, which are very similar bunk beds and bath setups, but they do usually take reservations, and are a little newer (maybe cleaner?), and they are also quite affordable (12-20 euros per bed). We poked our head into 3 or 4 public Albergues, and they were all serviceable, but we chose to stay in a couple of private Albergues, mainly because we could make our reservations a few hours or a day or two ahead of time, and have the peace of mind that we were "booked". Some private Albergues also have "private rooms", which are a really good deal, if you're traveling in a small group of 2-4.
I was traveling with one other friend, and 9 of the 12 nights, we managed to book our own private room (usually two twin beds, and an en suite shower and toilet) for about 40 euros for the two of us -- which we always opted for, over say a 12 euro apiece bunk bed. There are a few private apartments and hotels available too -- these are probably in the 50 euro - 80 euro per night range -- still very affordable. For the region we were in,
Booking.com (which has a pretty decent app), was absolutely the way to go. It was easy to find availability, prices, features, addresses, ratings, and communicate with the hosts (with translation capabilities built into the messaging app).
The only thing we pre-booked before we left home, was our first night at the Hilton in Porto, and our last nights, at the Marriott in Santiago. These were obviously much, much higher end accommodations, and we paid much more for those (nearly 200 euro a night). The fancy digs were nice, but totally unnecessary.
Oh, and maybe two nights along the way, we stayed at "farmhouses". These were my favorite accommodations by far. One was at a vineyard, with the traditional home cooked, communal dinner, which we shared with 8 other pilgrims. Truly unforgettable experiences. If I were to do the Camino again, I would absolutely seek these out, though you do have to book these in advance (we just got lucky), as they are extremely limited and very popular.
Related to accommodations, I also brought my own lightweight
Marmot 55F summer sleeping bag, and a
very tiny Summit Aeros Down Inflatable Pillow. This is a tough one. Strictly speaking, these were not entirely necessary. The sleeping bag was a lot of extra weight (1.5 lbs), and every single place we stayed provided sheets, pillows, and pillow cases. I chose to use my own sleeping bag in the 3 bunk room setups, but I totally could have used the provided sheets. All that said, having my own sleeping bag and pillow was an important piece of mind, in that I knew that I could sleep literally anywhere, as long as I had them. On a subsequent Camino, though, I don't think I'd bring a sleeping bag at all, and instead would just plan on taking accommodations that provide sheets, or bring a very
light sleep sack.
Cooking / Meals
I considered bringing my
ultralight MSR camping stove (and buying fuel), but ultimately did not. That was a good decision, as that would have been completely unnecessary. There are plenty of cafes and restaurants along the way. Most lunch and dinner spots have a "pilgrim menu" which is a basic package for 10 euros of a drink, appetizer, entree, and dessert -- so super cheap to eat. Of course you can order anything you want on the full menu any time. The wine across Galicia and Portugal is amazing! The red wines are mostly Tempranillo (or similar) and the whites are Albarino (or similar) from the Douro valley, and delicious. You'll rarely pay more than 3 euros per glass Full bottles of red or white wine is readily available for under 10 euros -- and their top shelf super reserva is rarely more than 20 euro a bottle, and it's usually unbelievable stuff.
I did bring a
Snow Peak cup and
Snow Peak spork. The cup was useful -- I used it every day, and I like to have a glass of water by my nightstand at night. I never used the spork -- it's not needed. I did however bring a tiny
corkscrew, which came in handy a couple of times.
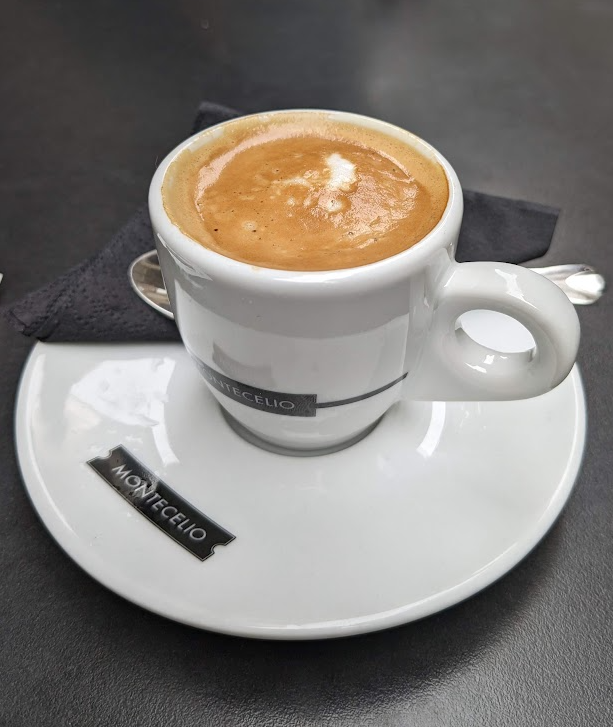
Coffee
Probably the one thing I considered bringing, but did not, but REALLY should have, was my
Aeropress coffee maker. For no good reason, I took it out of my pack at the very last minute, and I very much regretted it, almost every single day.
Excellent coffee (espressos, cortados, cafe con leche, etc.) is always available at every cafe along the way, and it's really cheap (1 euro typically). But at the hostels and hotels, the coffee is universally awful. There's always a kettle that can boil hot water, and there's usually tea. But almost everywhere has that dissolvable Nescafe instant coffee. I found it just undrinkable.
We found a drip coffee maker in just 1 of 12 of our lodgings, and a pod coffee maker (like a Keurig) in just 1 of 12 as well (and that was a private apartment / airbnb type thing). So most mornings meant stumbling out of bed, packing your backpack, maybe choking down some Nescafe, and then bolting down the trail sans caffeine until the first cafe (which was sometimes packed with pilgrims doing the same thing). The Aeropress would have taken very little space, very little weight, and coffee grounds were easily available at markets and kettles for hot water. Seems like such a trivial thing, and maybe I'm more coffee-focused than most, but this was probably my only significant packing regret.
Towels / Laundry
I did bring a
quick-dry camping towel, which I'm glad I had for those 2-3 communal showers, but almost everywhere else provided towels. Strictly speaking, this probably isn't 100% necessary, but it was nice to have.
I had a little
drawstring collapsible backpack, which I used as my laundry bag. That was nice, and amounted to a negligible amount of extra weight and space.
First Aid
I also brought a
very basic, pocket first-aid kit. I used a couple of band aids, and popped a couple of
Ibuprofen at the end of the longest days. I also had a
sewing kit, which I didn't use, but I did give the sewing needle away to a fellow pilgrim than needed to pop and drain a terribly infected toenail (gross, you can keep the needle, pal). I popped and drained my own blisters just with my fingernails, which was fine (and provided a ton of relief!), and just wiped those down with alcohol wipes. Oh, I also took some
Dramamine for the bus ride back to Porto. Thankfully, I didn't need any of the rest, but I had a couple of
anti-diarrheal tablets, some
antihistamine,
bite and itch cream. My hiking partner also brought some
melatonin which came in handy on the plane and for that first night of weird jet lag sleep.
Other Things I Should Have Brought
Things I Really Could Have Left Behind
Part 2: Insights, Advice, and Retrospective
My Camino was truly an amazing experience! If you're even remotely considering it, you'd almost certainly enjoy doing it.
History and Basics
Just some basic Camino history, before I dig in...
- The Camino de Santiago (or, The Way of St. James) has been a religious pilgrimage for over a 1000 years, traveled by literally millions of people.
- There are dozens of different popular starting points, though you can start your Camino anywhere you choose.
- The only requirement to getting your "Compostela" (a parchment certificate that officially recognizes your completion), is that you walk the last 100km to the cathedral of Santiago.
- The medieval Camino has its roots around the 900s, and then further popularized by a "guidebook" published in 1140, called the Codex Calixtinus.
- Also, St. James (the apostle whose remains are believed to be held at the cathedral of Santiago), is the patron saint of Spain, one of the major sponsors of the crusades, and his popularity rose tremendously in medieval times.
- The trail was mostly forgotten in the 20th century (just a few hundred pilgrims a year), until a guidebook was published in 1957, and since then, there has been a huge resurgence of interest.
- Of course the 2010 film, The Way with Martin Sheen and Emilio Estevez (which is excellent, by the way), also helped bring the Camino to American audiences and interest has surged. Now, several hundred thousand pilgrims make the trip every year.
- Of the dozens of routes, the most popular is the "French Way", which is the Camino depicted in the movie The Way. It's 422 miles, and takes about 5 weeks.
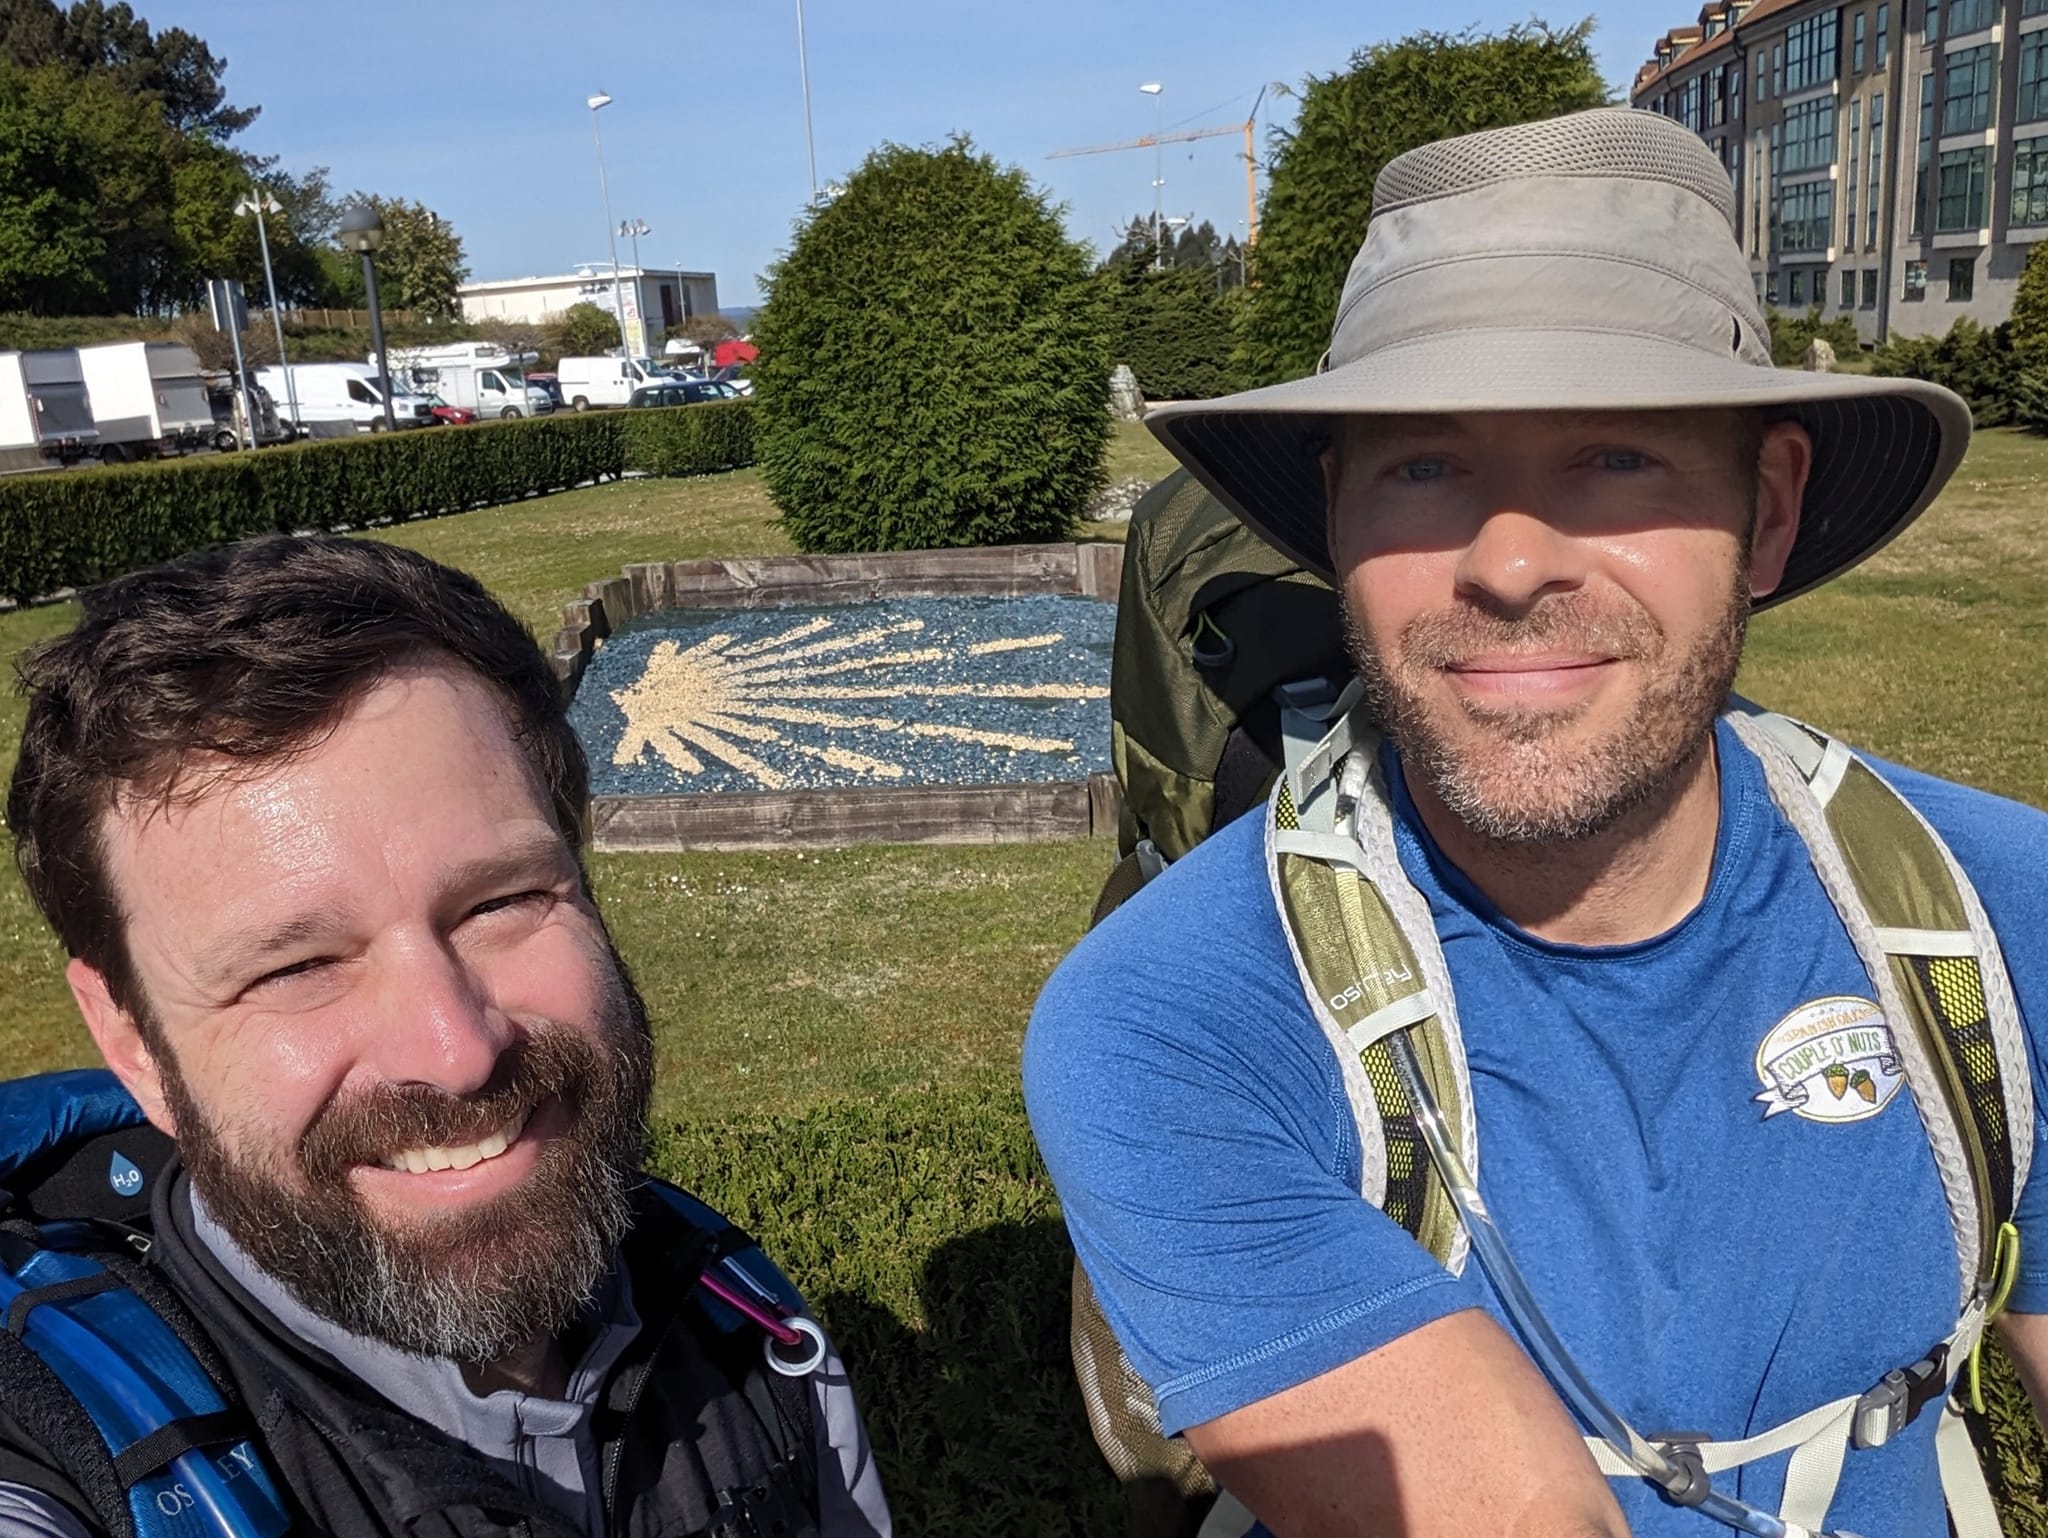
- Perhaps the second most popular routes is the Portuguese Way, roughly 160 miles and takes about 2 weeks, which is the path we took.
Our Way
- We started in Porto, Portugal, and took the "Central Route", which is inland among the hills and vineyards, but there's also the "Coastal Route", which of course hugs the coast (though the weather can be pretty rough, or so we heard).
- Our Camino Portuguese Central was about 160 miles, and we did it in 12 days of walking, averaging about 13 miles (a half marathon) a day, with our longest days around 18 miles and our shortest about 9 miles.
- There was some elevation to climb and descend every day, but it was all very reasonable. I found it about the same difficulty as hiking around the Texas hill country near Austin. Hilly, but certainly not mountainous. Nothing like Colorado or Switzerland. But also, it's not all just flat walking.
- Most days, we walked for about 3-5 hours, typically starting between 7am and 9am, and finishing around Noon-2pm.
- There were other pilgrims who left much earlier than us every day (probably either much slower, or going much farther, or both), and some who left later, or walked later.
- When we really pushed, with no stops, our fastest miles were about 17 minutes per mile (as measured by my Pixel watch and my hiking partner's Garmin), though a much more comfortable pace, taking a few pictures, conversing, and relaxing a bit, was closer to ~20 minutes a mile.
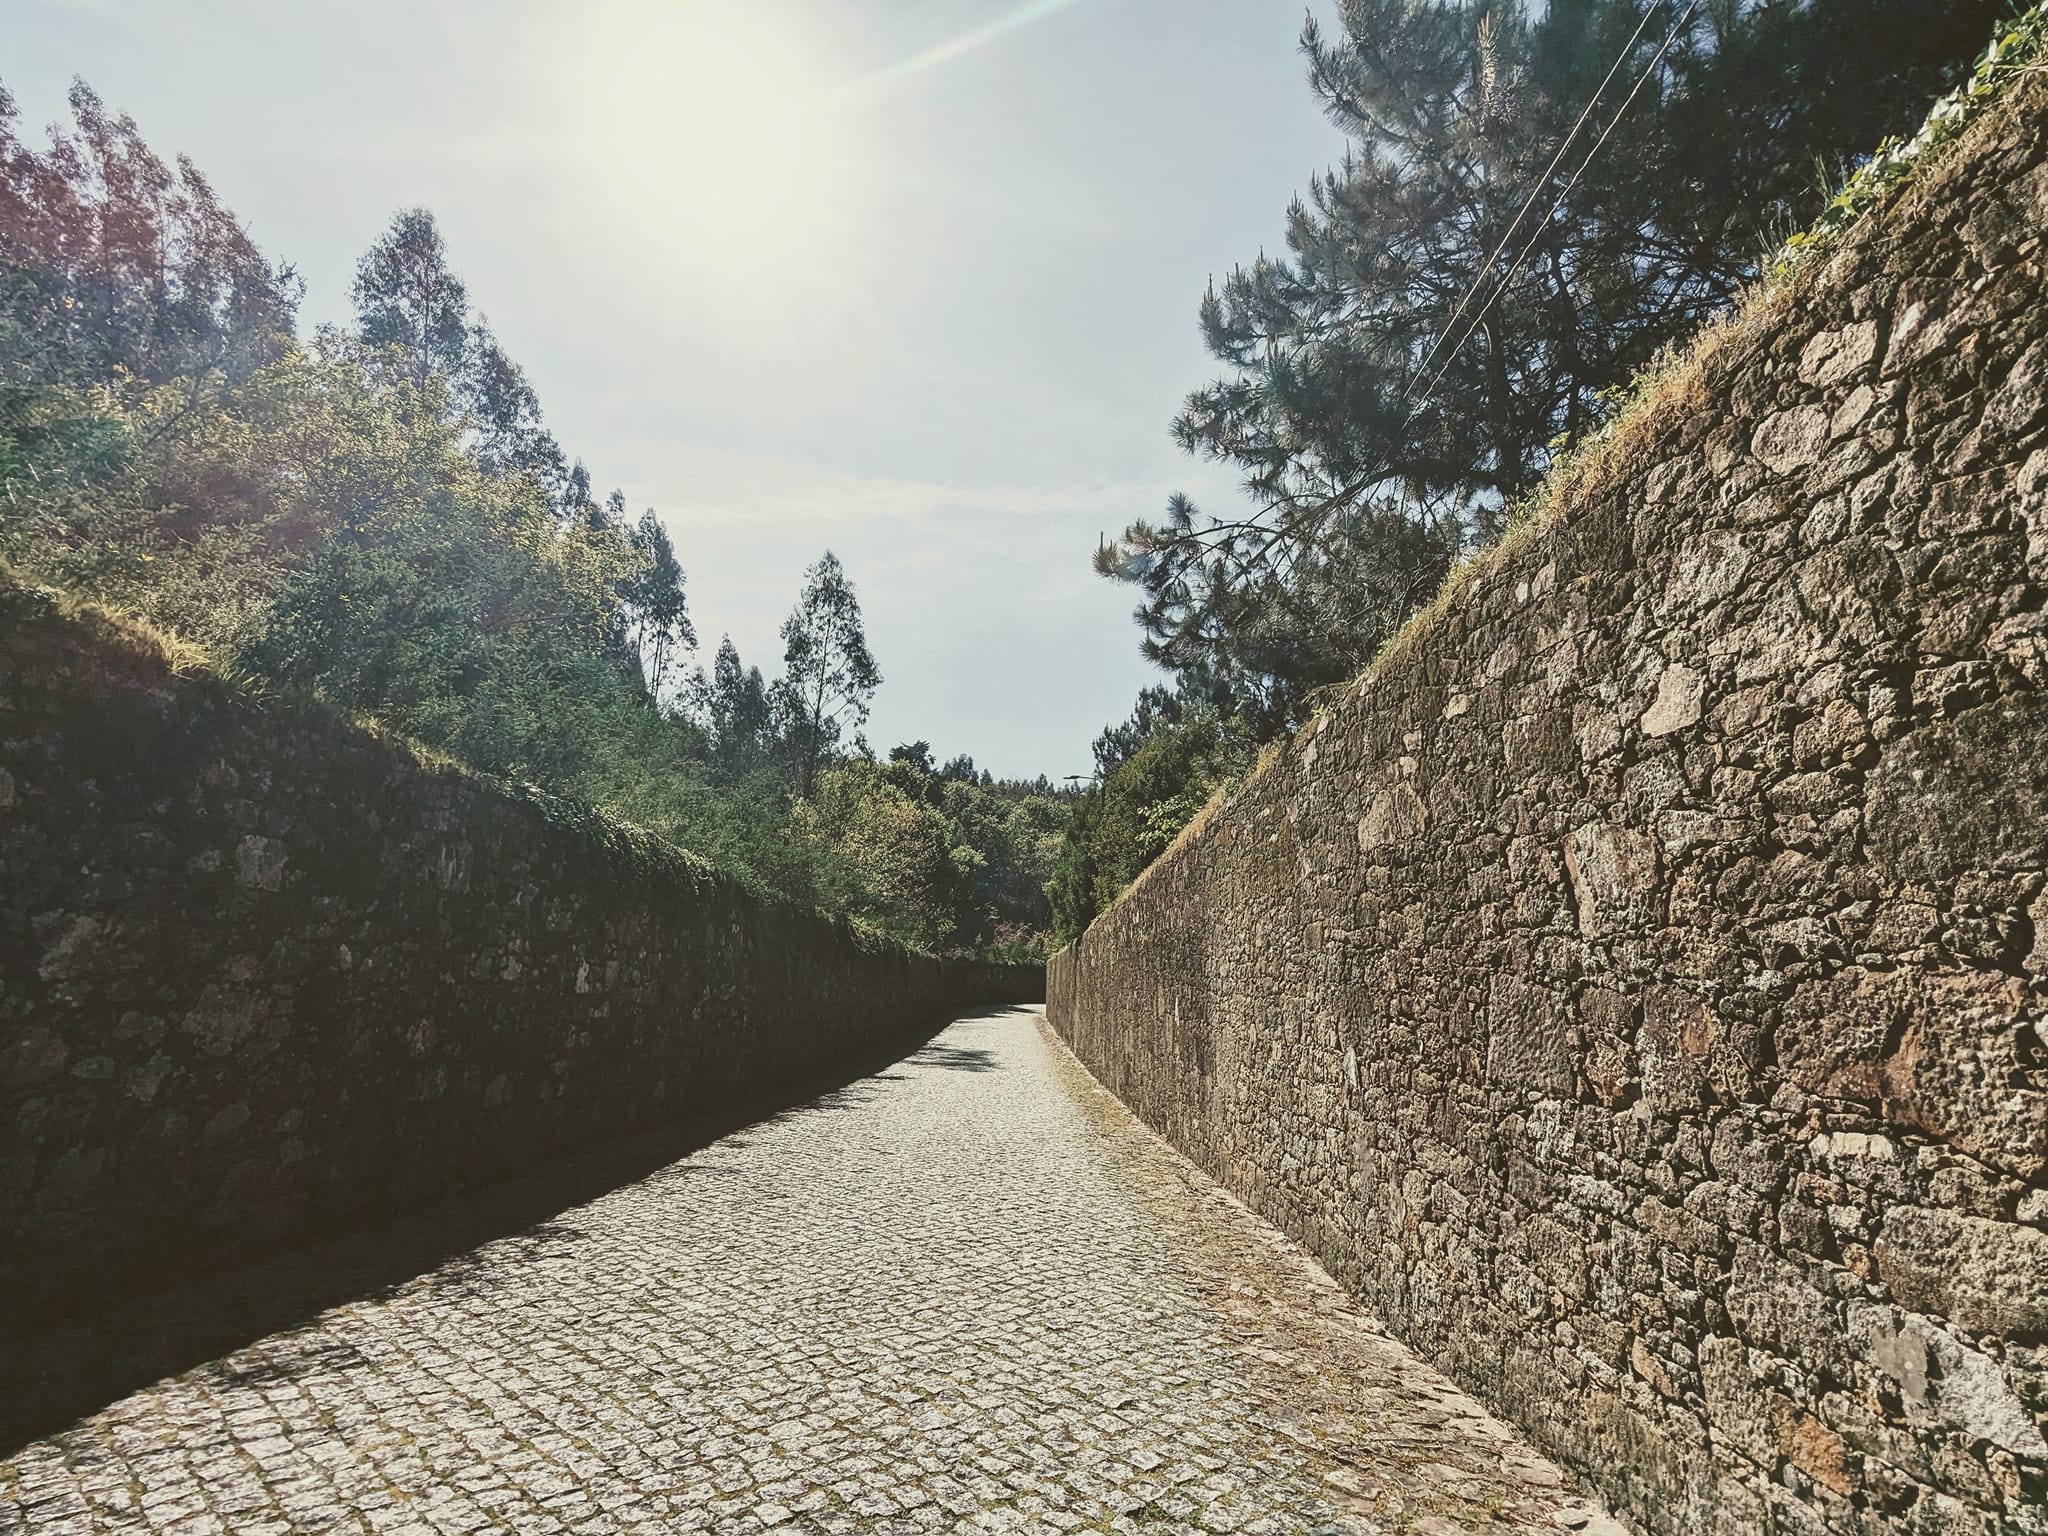
- Perhaps the most surprising, and maybe most disappointing part about the Camino, is how much of it is on asphalt, concrete, pavement, or cobblestones, and how very little of it is on dirt or rock trails.
- There are probably some official numbers somewhere, but I'd estimate that less than 10-15% of our whole Camino was spent on trails, and 85-90% was spent walking on paved streets or cobble stones.
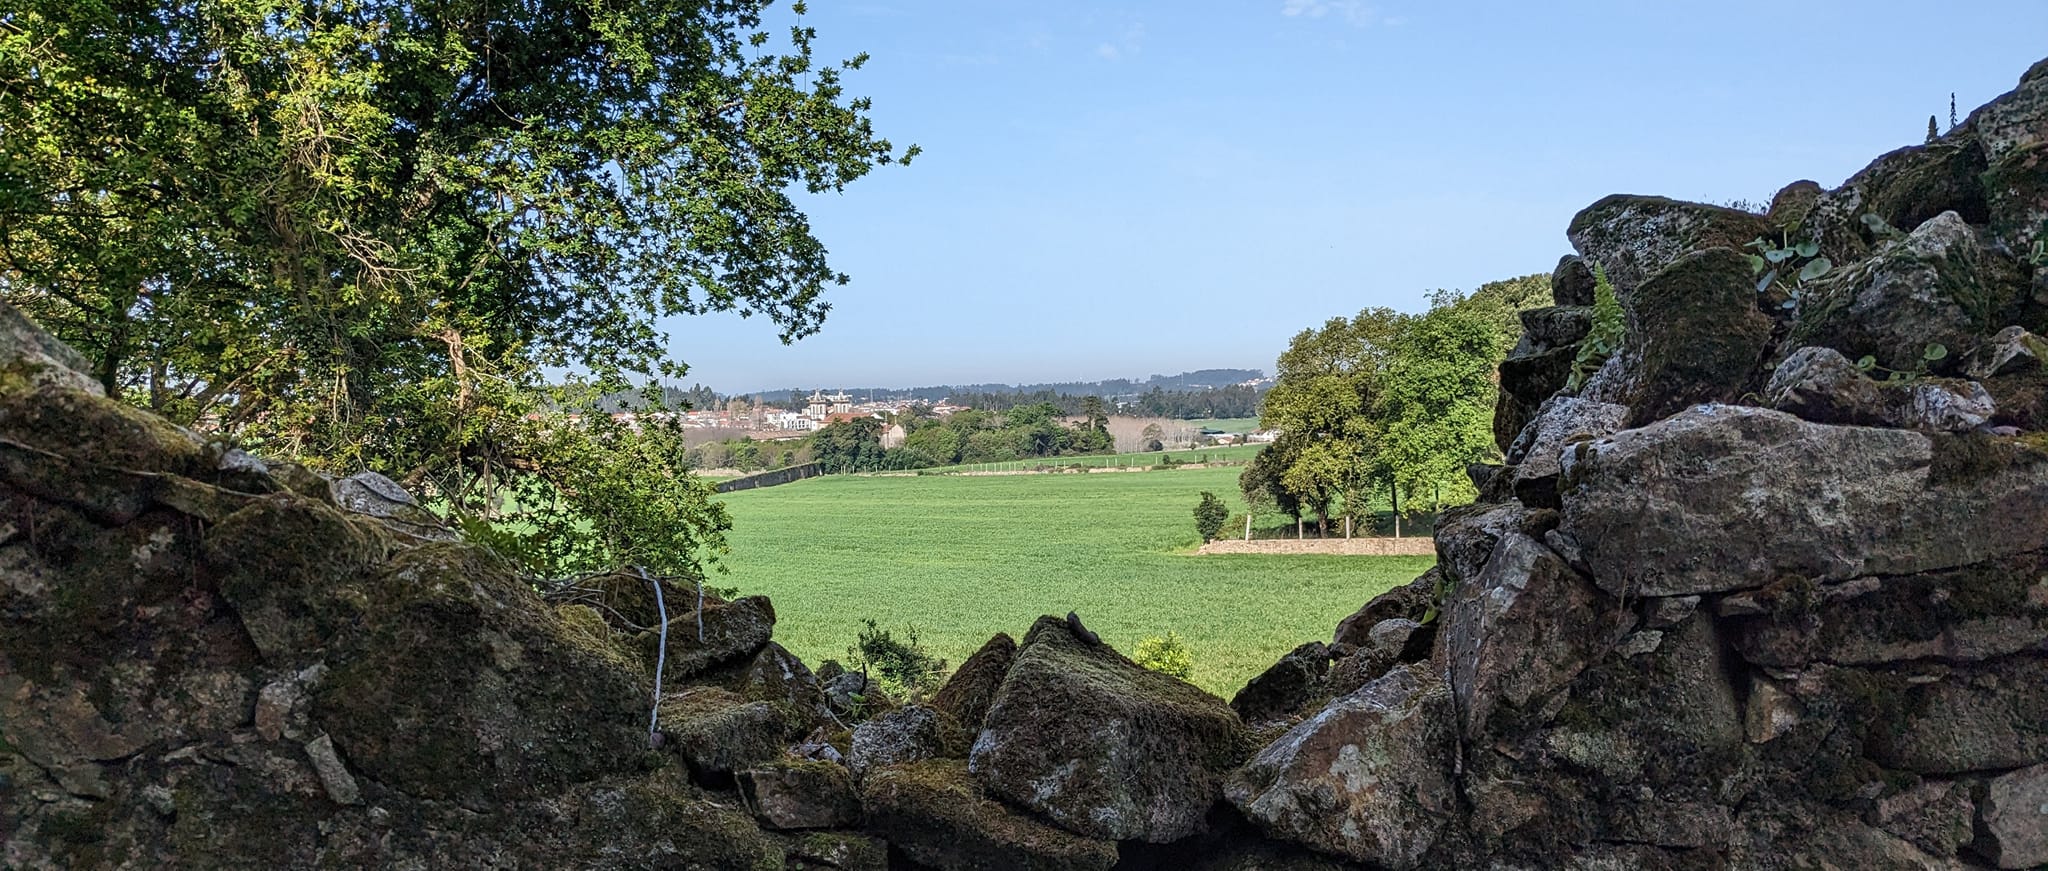
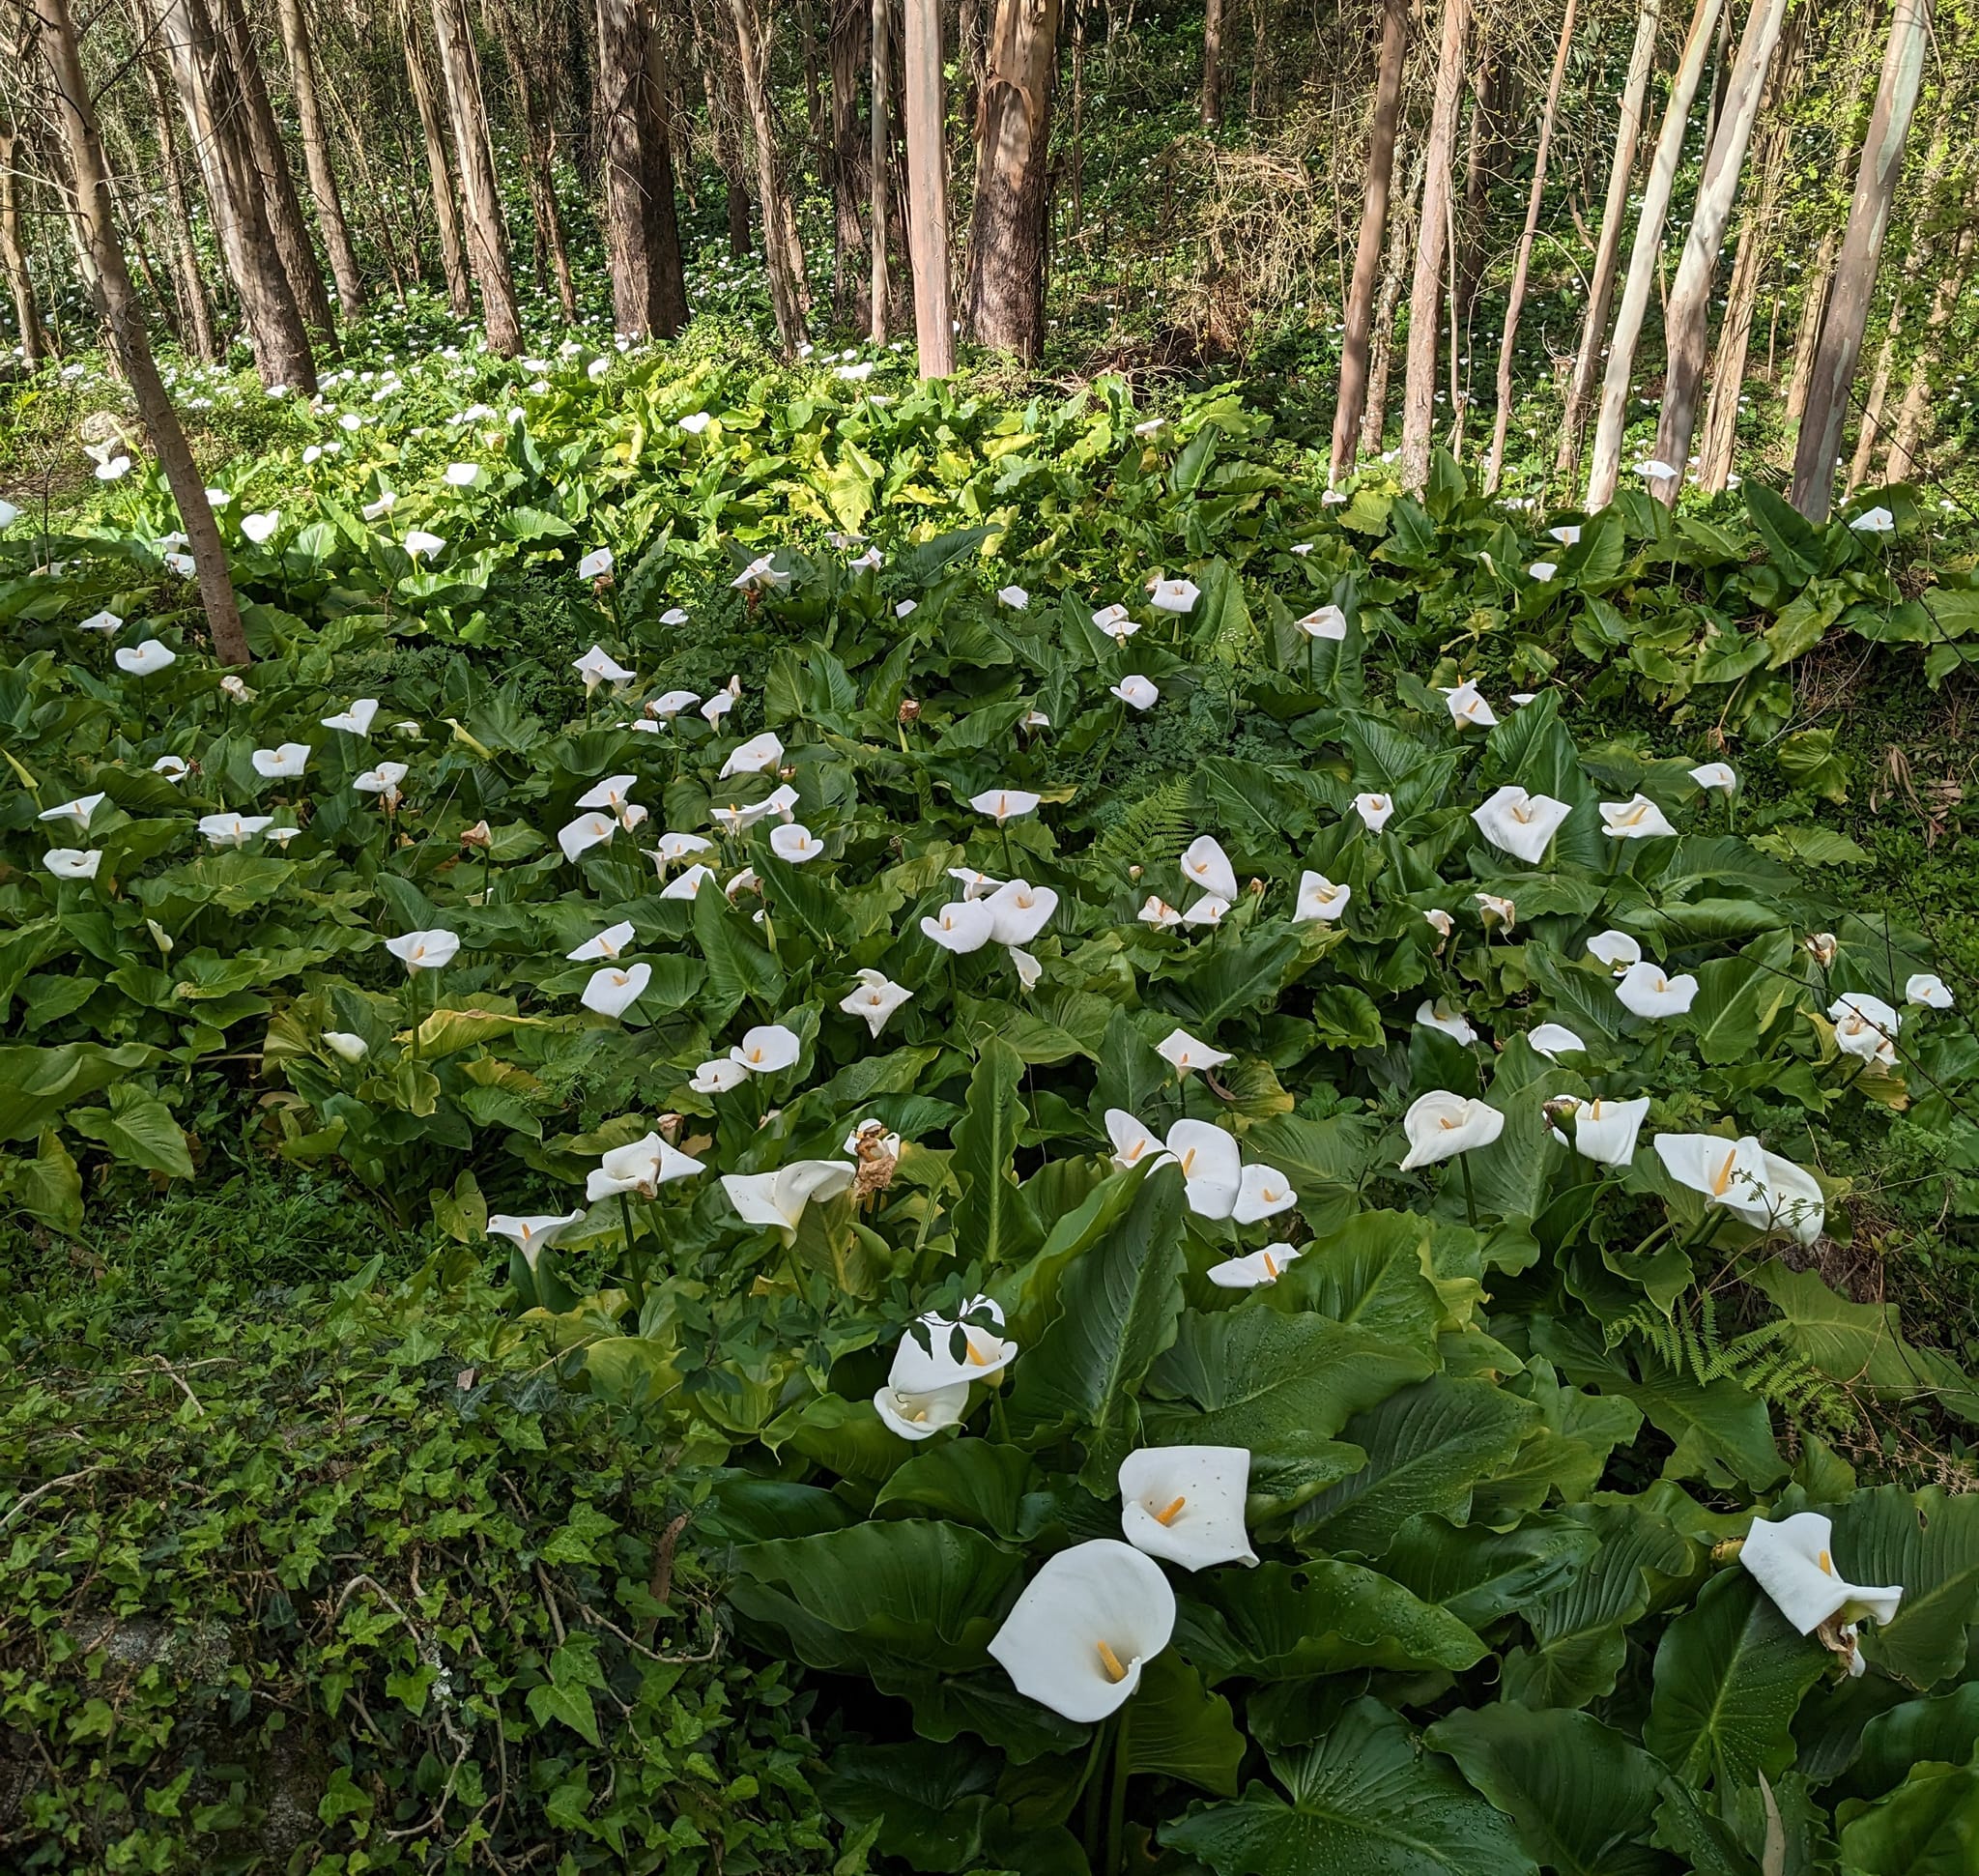
- Also, I'd say that at least 65-70% was "urban", walking among buildings, towns, villages, and only about 30-35% in fields or the woods or within vineyards or farms.
- That might be fine by you, but I think I was expecting something a little more remote. My favorite trails all time are a little more remote treks through Scotland, New Zealand, Switzerland, along the Appalations or the Pacific Northwest -- the Camino is most certainly NOT that.
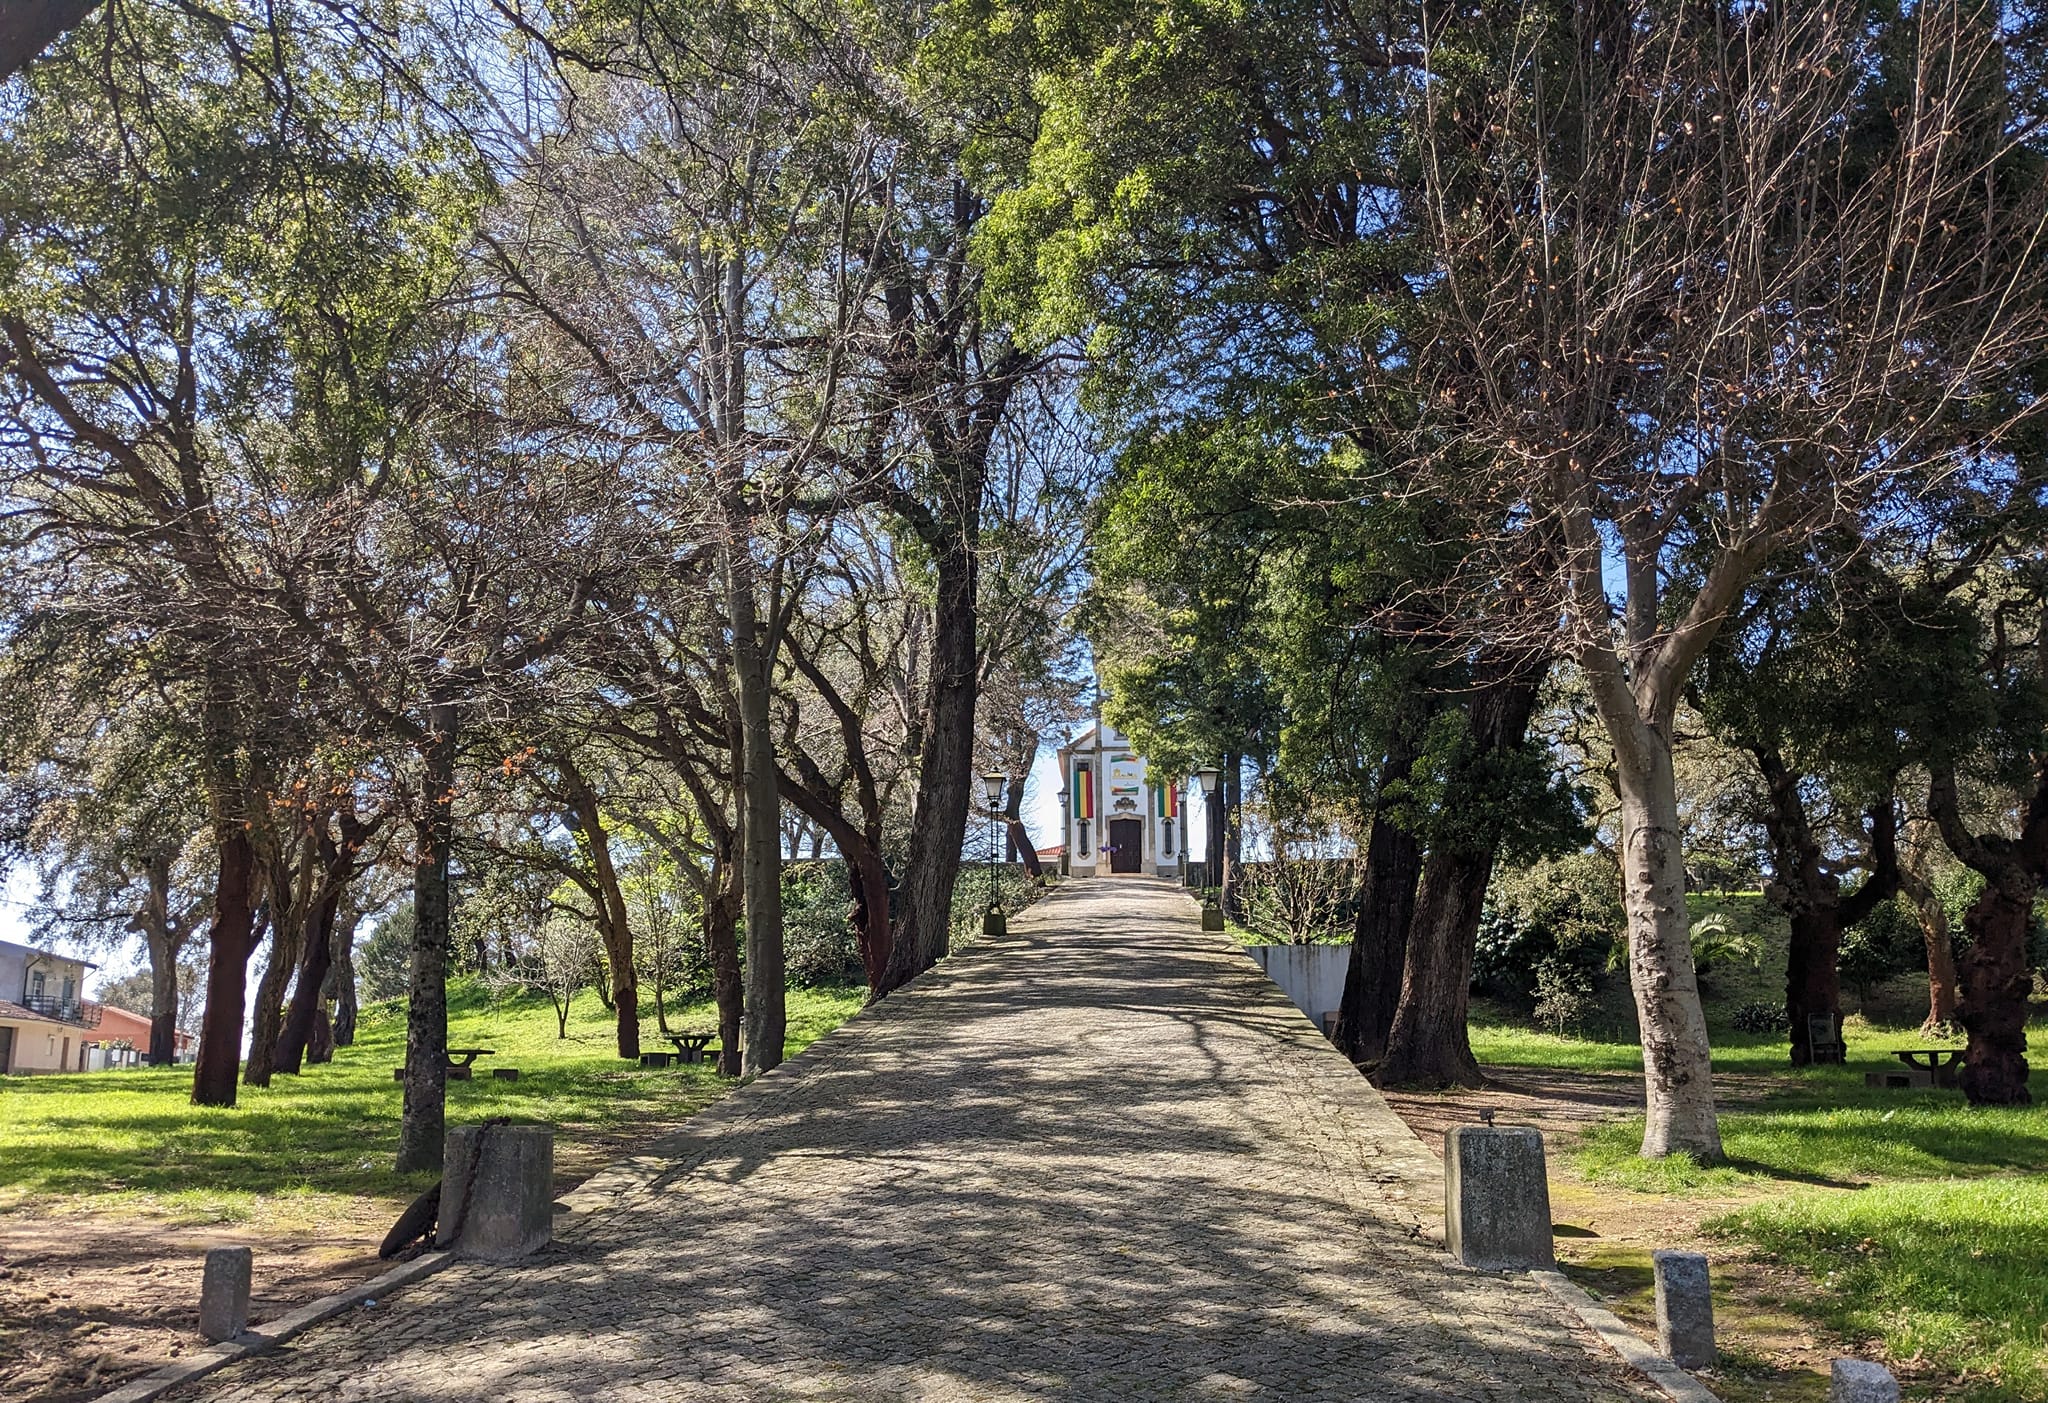
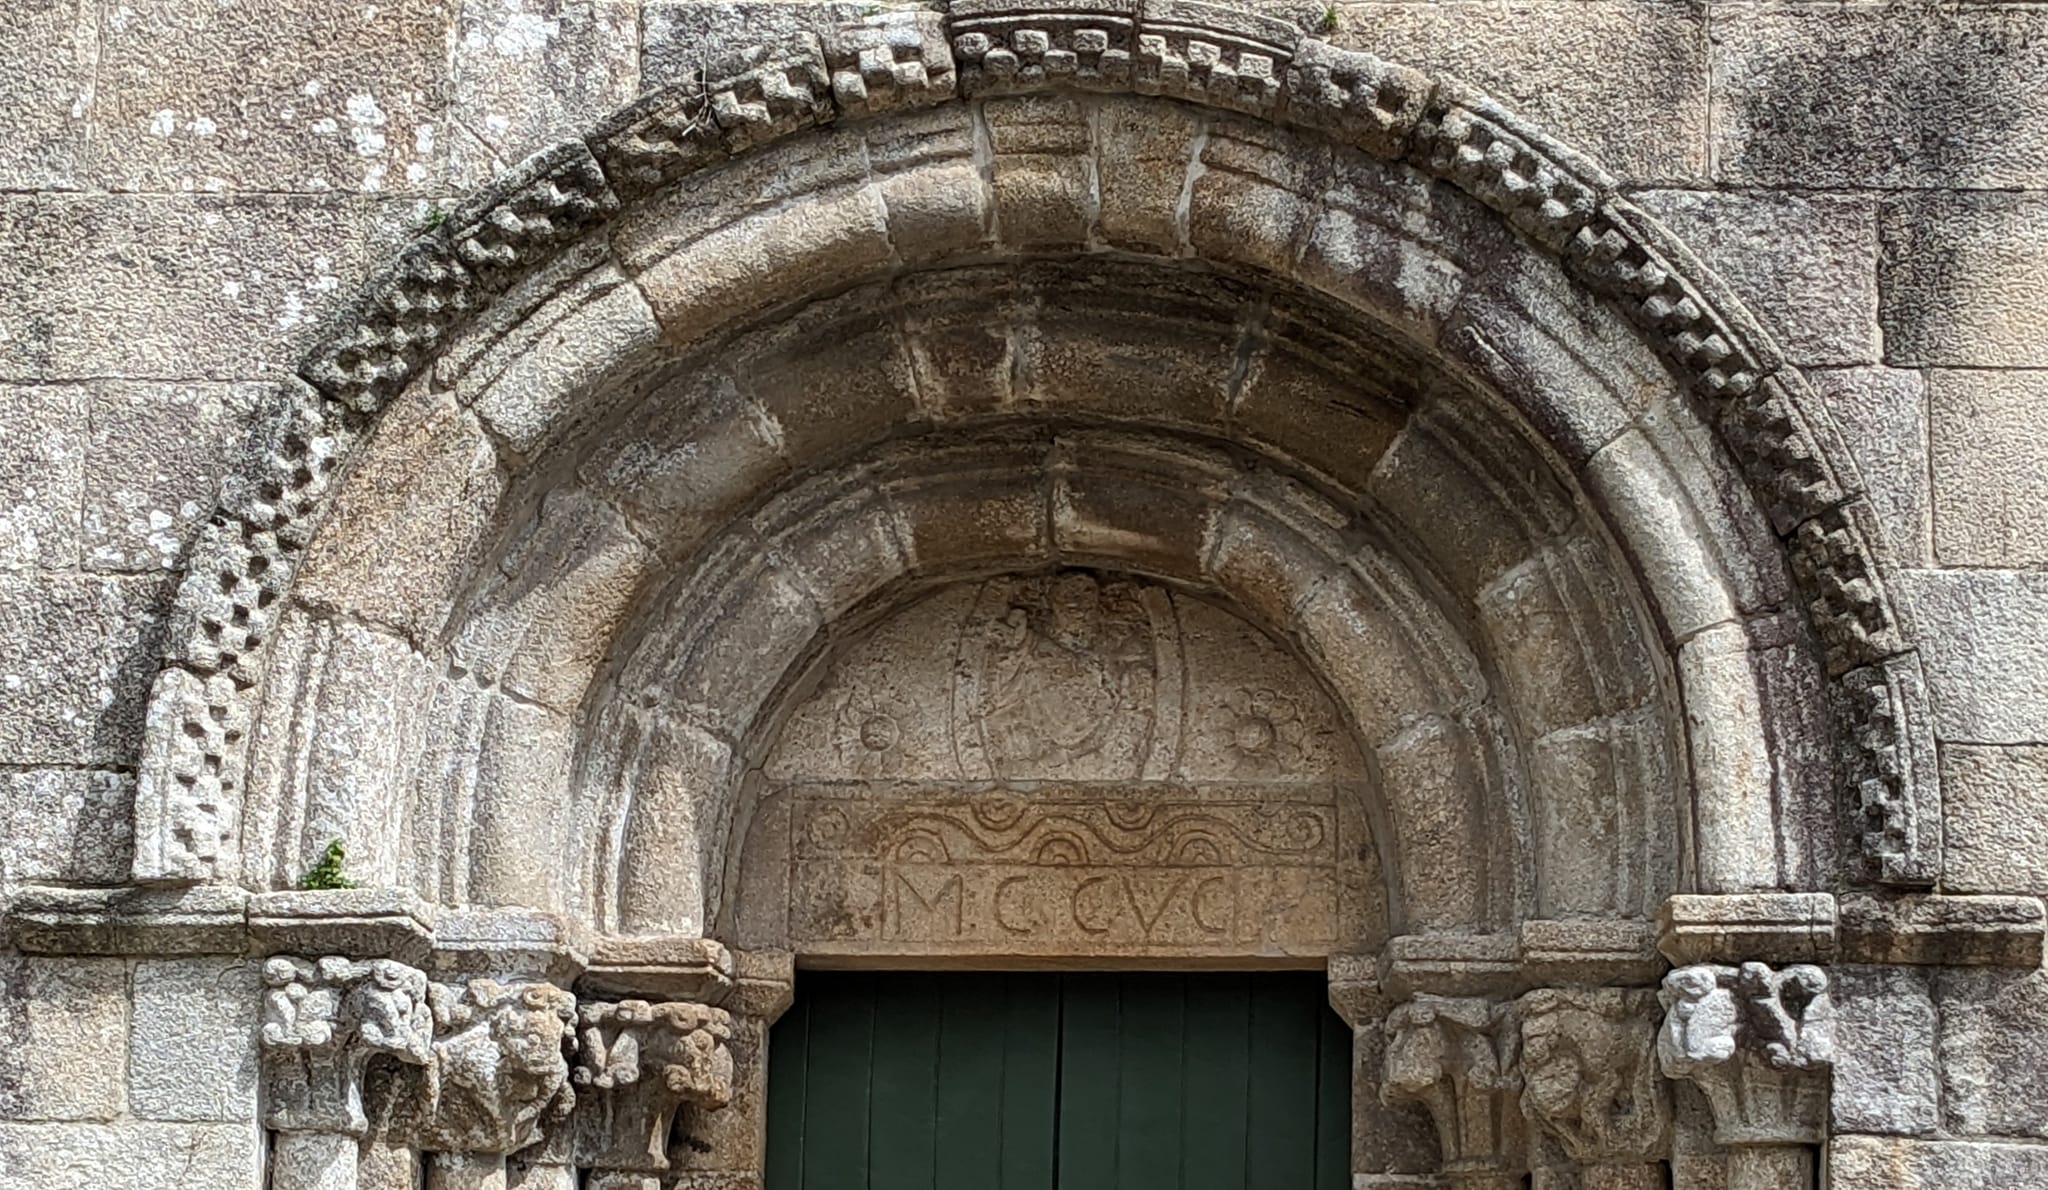
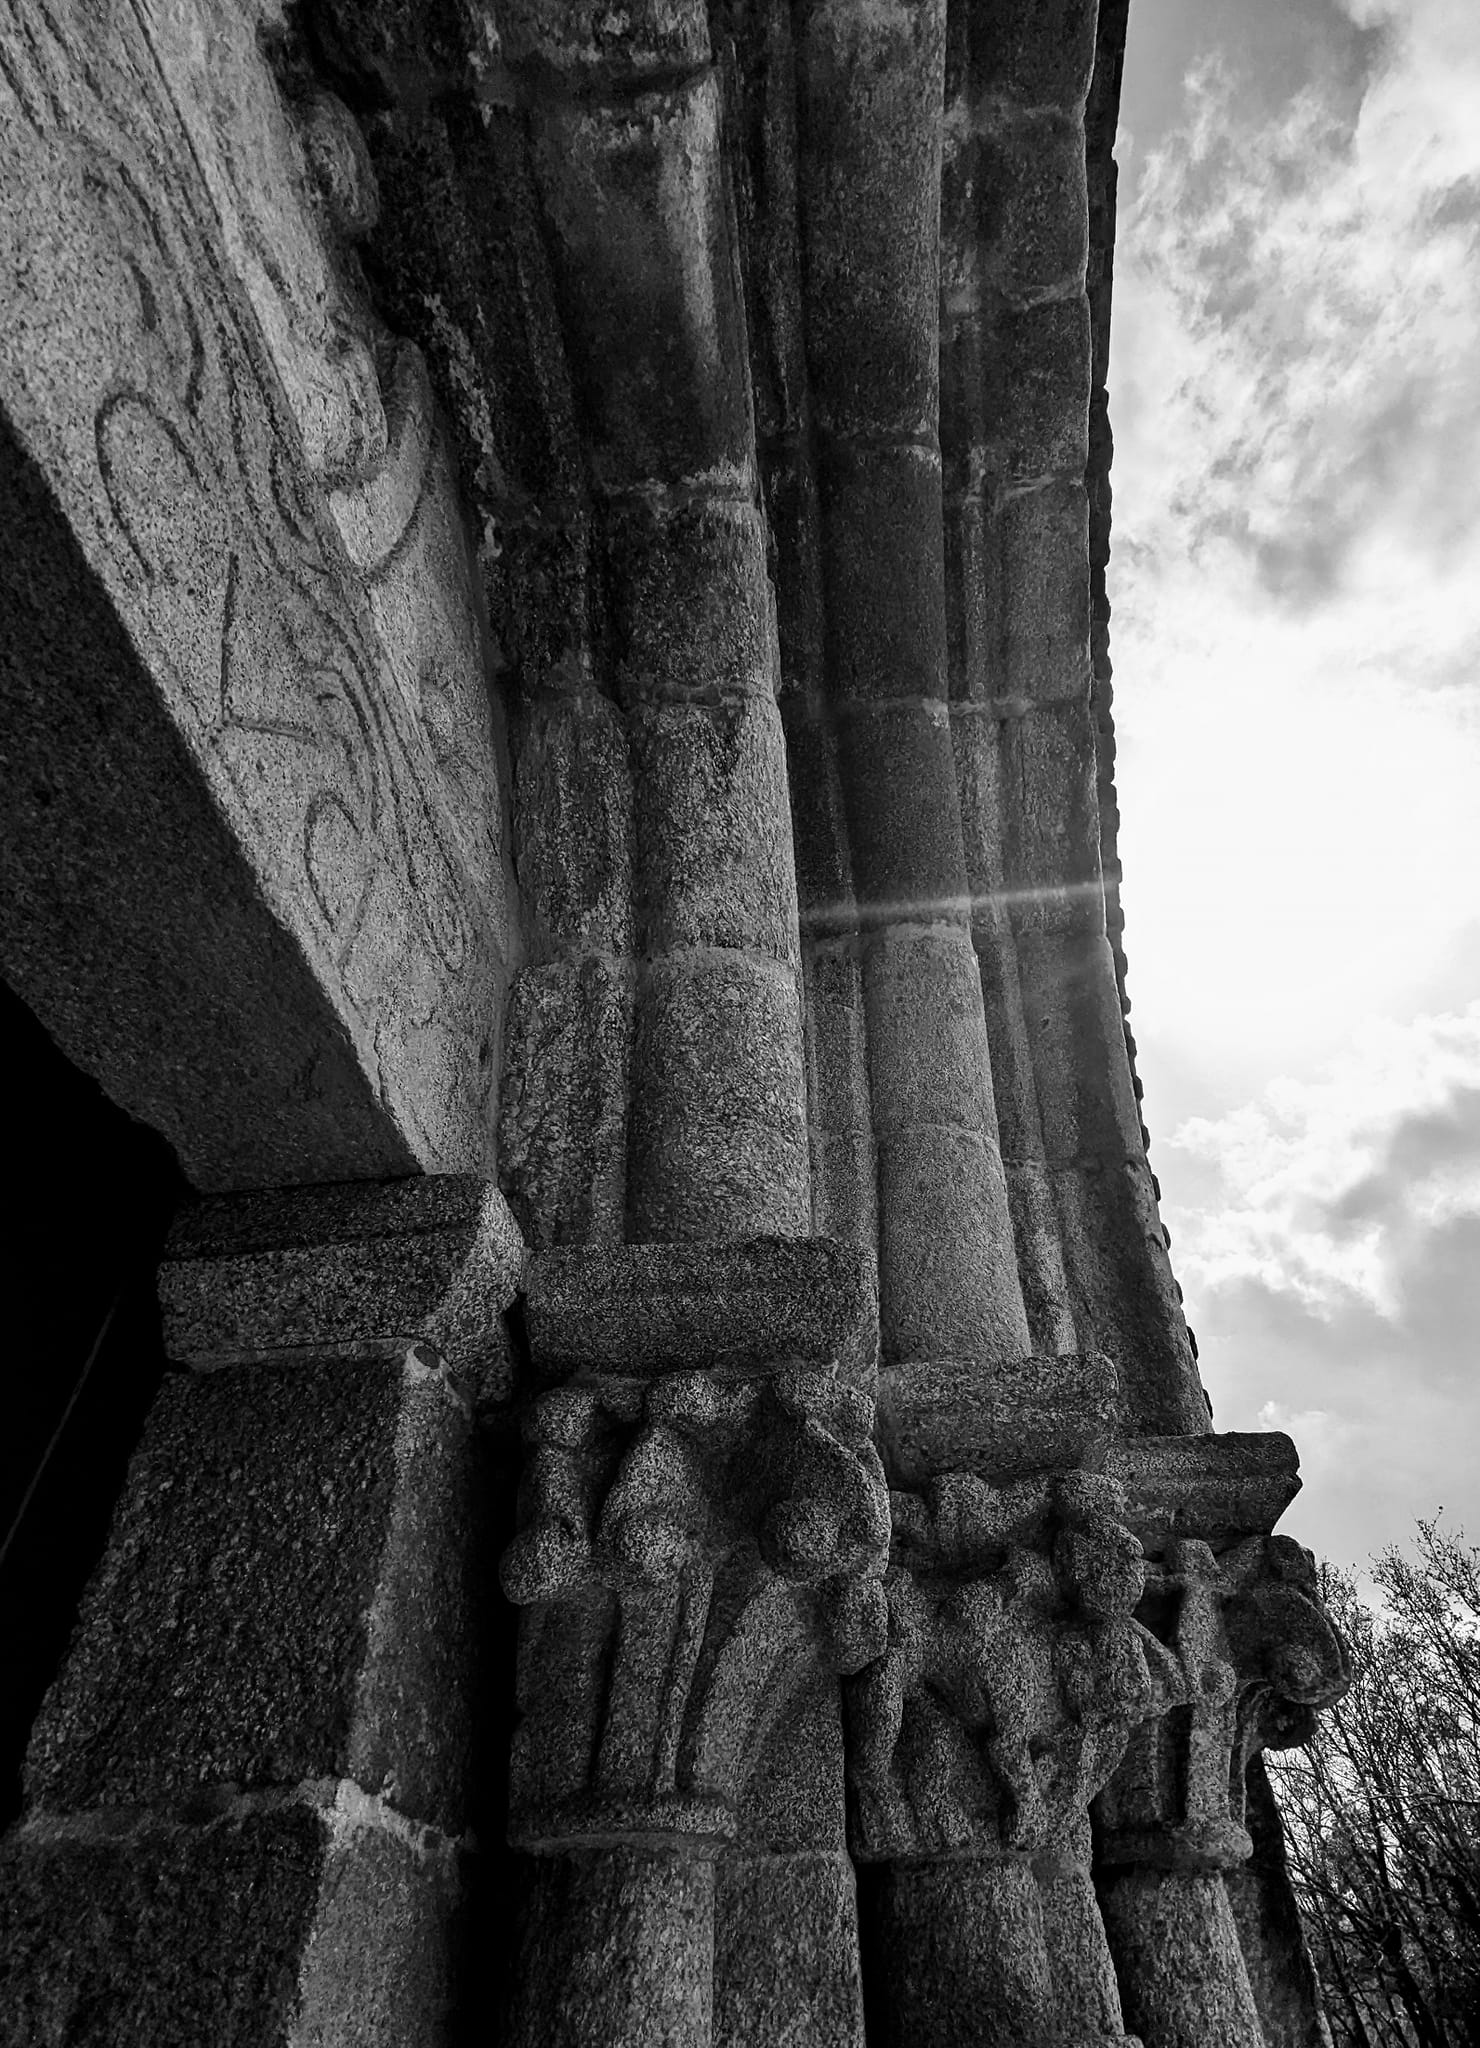
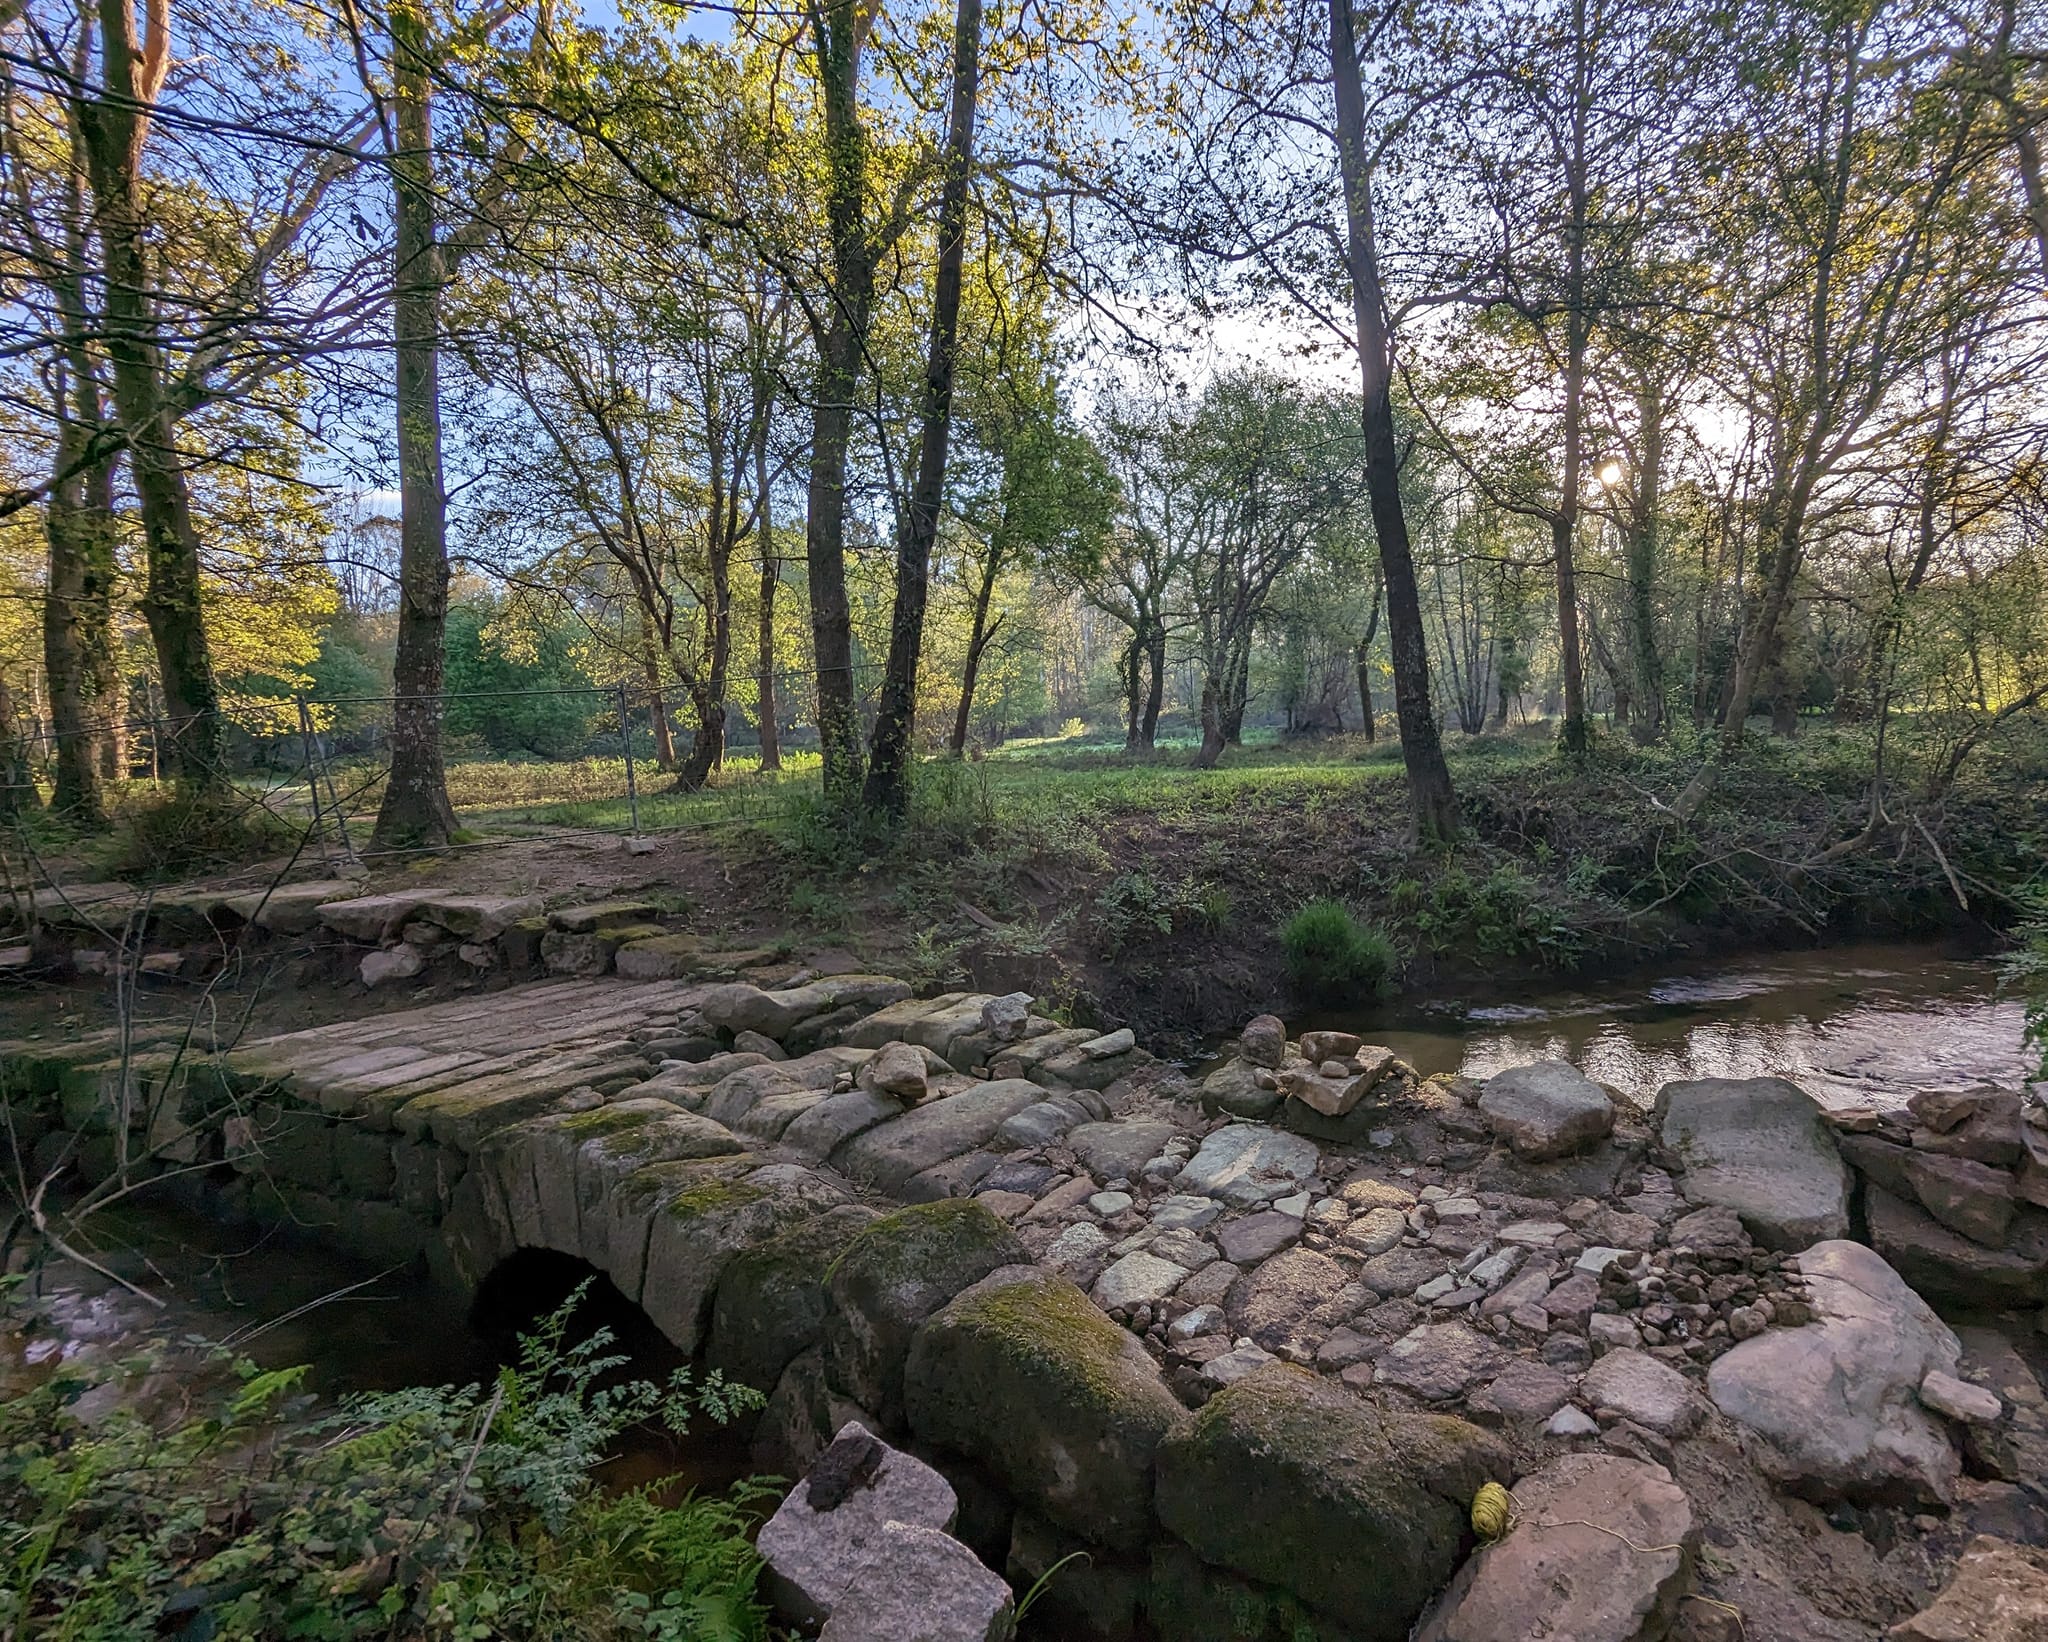
- But what the Camino is, is a walk through history. Many of those cobblestones I'm complaining about were laid by the Romans (and probably their slaves) literally 2000 years ago.
- Most of the Portuguese Camino follows Roman Road XIX (yes, the Romans basically had a numbered interstate system throughout Europe).
- There are stone mile markers (literally, "milestones"), carved in Latin, dating to the 1st century A.D.
- We crossed probably 20 stone arch bridges built by the Romans over 1500 years ago, and another 20 stone bridges built (or re-built) in medieval times 1000 years ago.
- There's just so, so, so much history. Castles, keeps, cathedrals, chapels, aqueducts, olive trees, grape groves -- many over 1000 years old. Let that sink in, and the hard asphalt and pavement do melt away.
Other Pilgrims on the Trail
- Our first few days, the crowds were very light. We just 1 other pilgrim on the first day, and less than a dozen per day, for the next 3-4 days.
- But as of April 1st, things picked up tremendously.
- Part of it, as we just got closer to Santiago, the trail got busier (back to the point that you must complete the last 100 km on foot to receive the Compostela).
- The other consideration was that we kind of accidentally started our hike that would put us into Santiago for Easter weekend. While that was an accident on our part, thousands of pilgrims traveling for more pious reasons were very deliberately covering the Camino over the course of Holy Week, and planning to land in Santiago specifically for Easter.
- We only met perhaps 5 or 6 other Americans on the trail (a group of 60-something retirees from Rhode Island, and a small group of retired ladies from California).
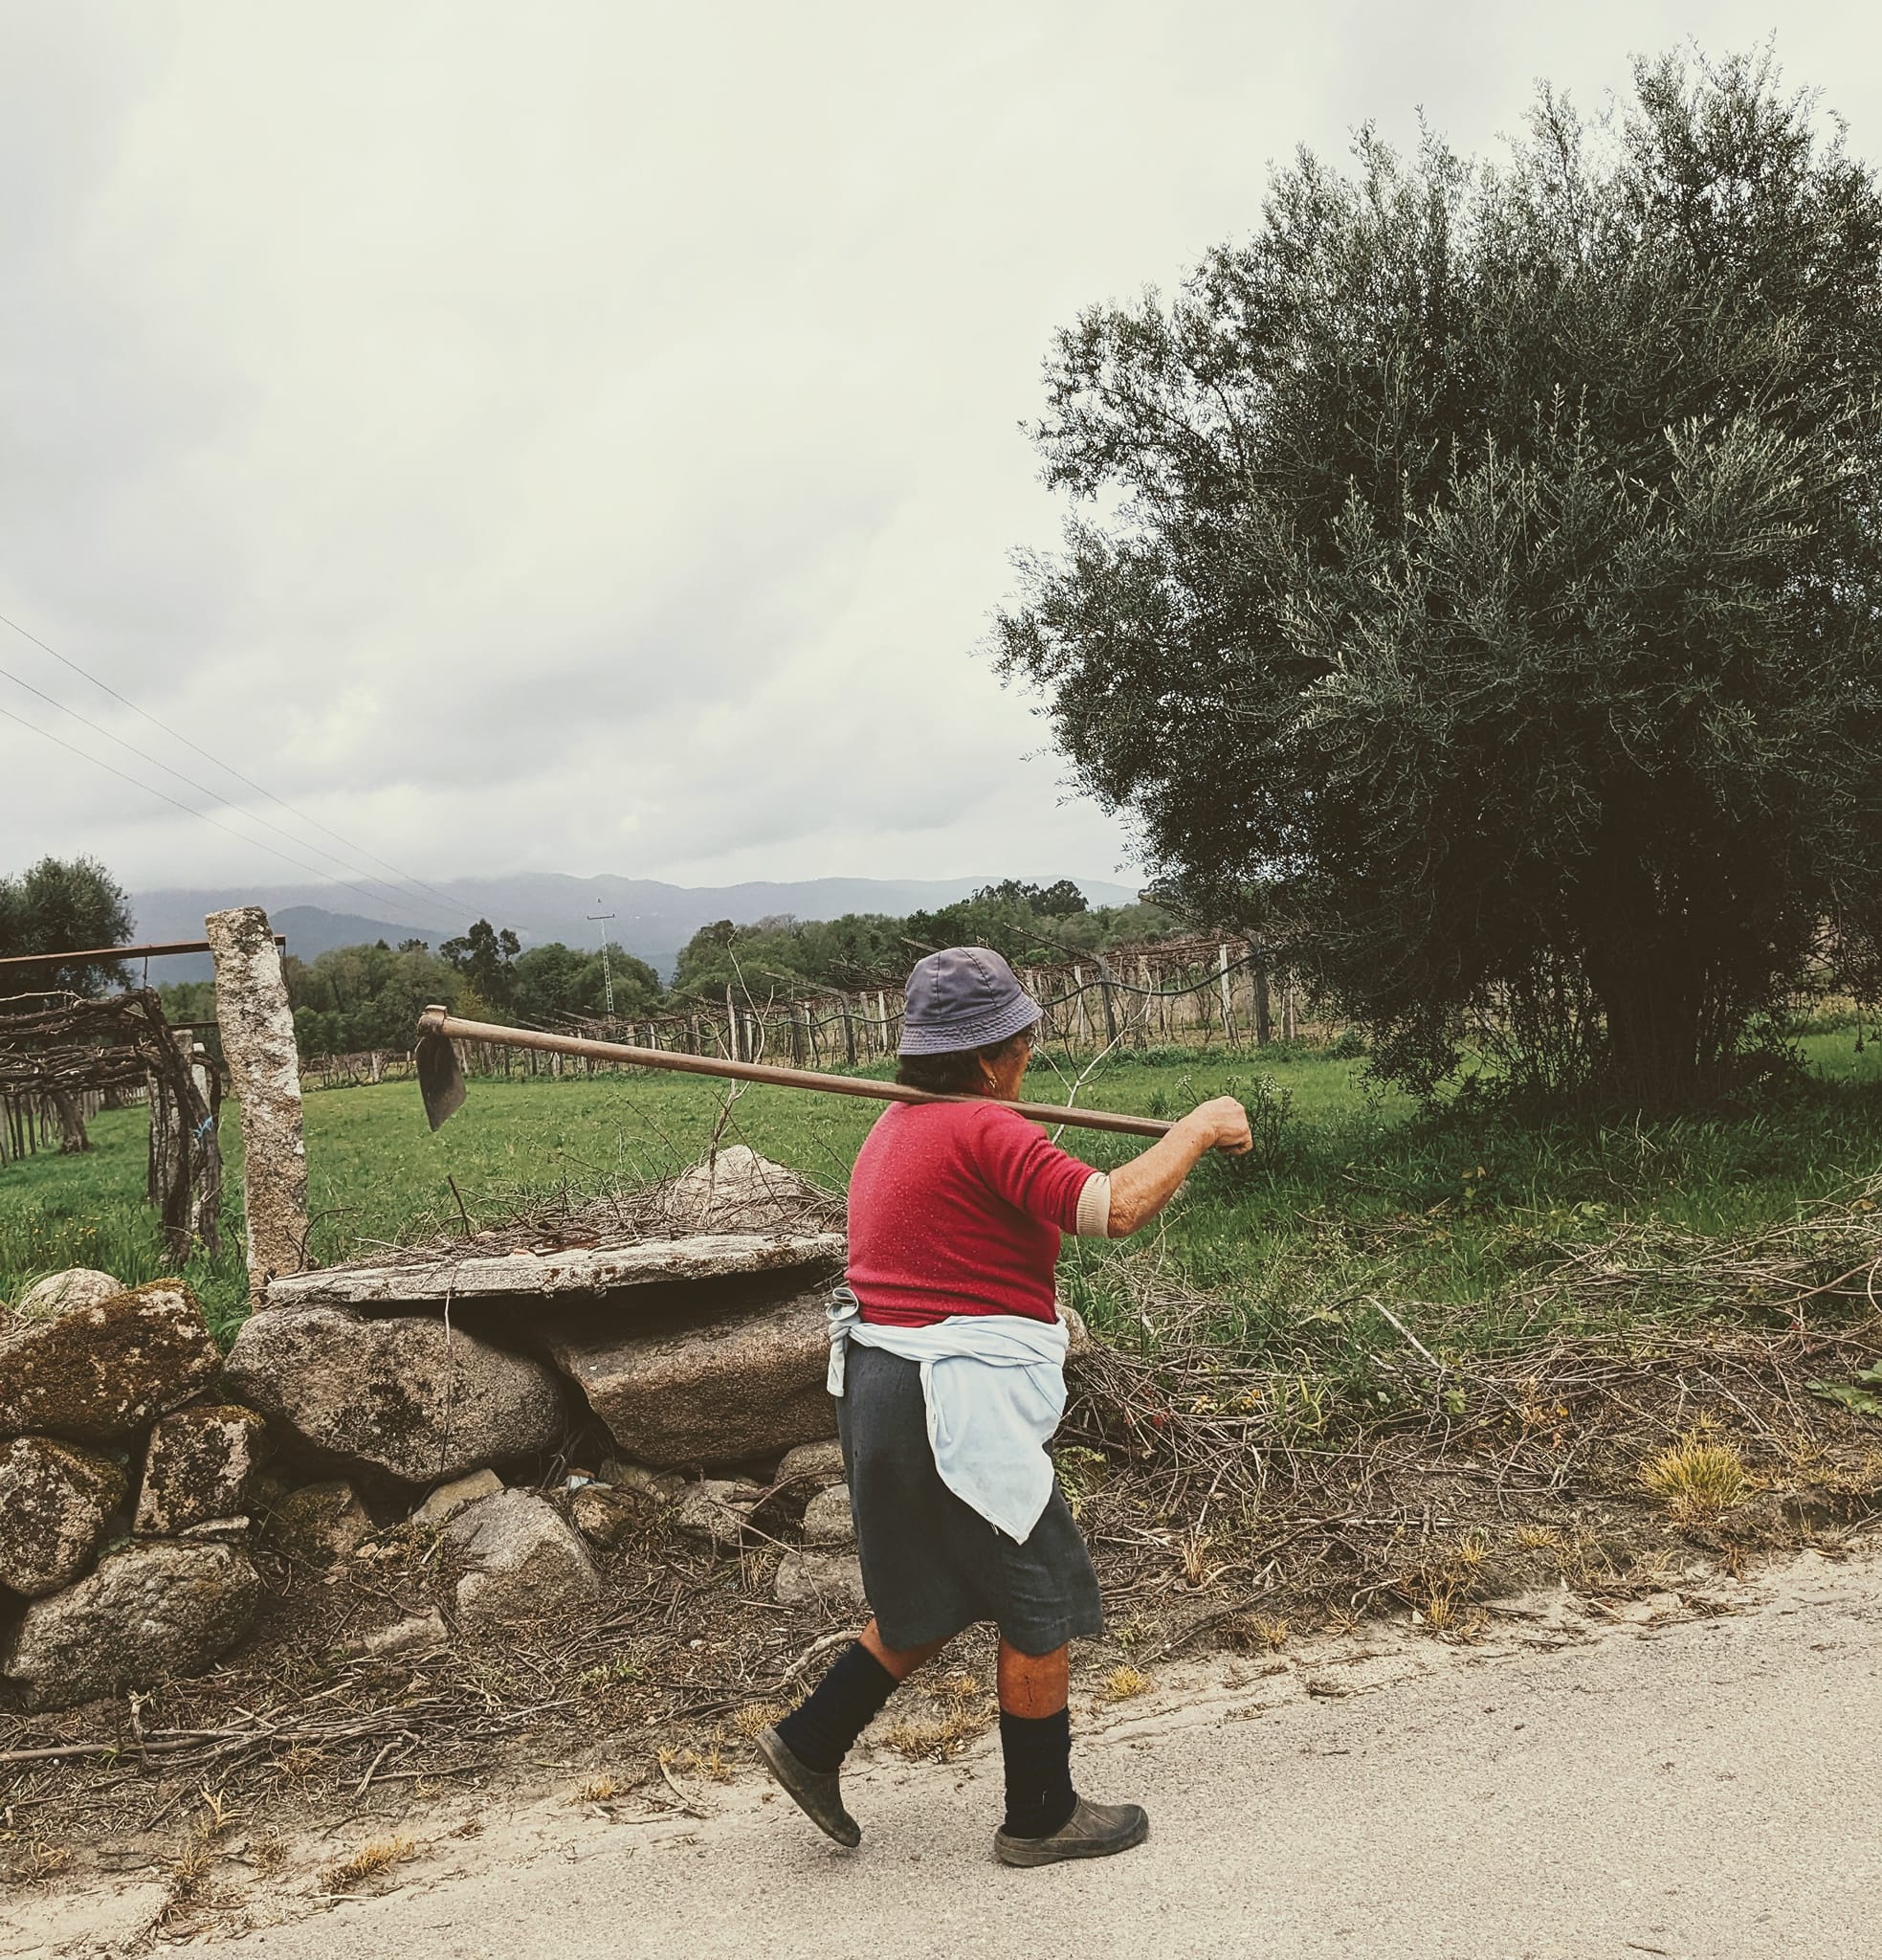
- From most-to-fewer, we met many Portuguese, Spaniards, Brazilians, Germans, and a smattering of French, Brits, Canadians, Taiwanese, Australians, Danes, Czechs, Swiss, and others I'm sure I'm missing.
- Interestingly, almost no one ever asks your name -- just where you're from. And from then on, you're mostly referred to by your country (or in our case, states, Texas and Colorado). It's kind of a nice convention.
- You end up seeing many of the same people every couple of days, roughly traveling in your cohort from stage to stage. That's pretty fun. Easy to engage, and get into a conversation with anyone, but also easy to keep your privacy and distance.
- The vast majority of people we met on the Camino, have done it before, many of them multiple times (like 7 or 8 times or so), and often different routes each time.
Logistics Advice for the End of the Trail
We struggled to find much information about how we were supposed to "complete" our Camino. Where do we go first? The Cathedral? The Pilgrims' Office? Our hotel? Where is the 0-km marker? Thus, we made a few mistakes, and so we'll try to help you out here...
Here's what NOT to do....which is exactly what we did....
- We got in line to visit the Santiago de Compostela Cathedral itself.
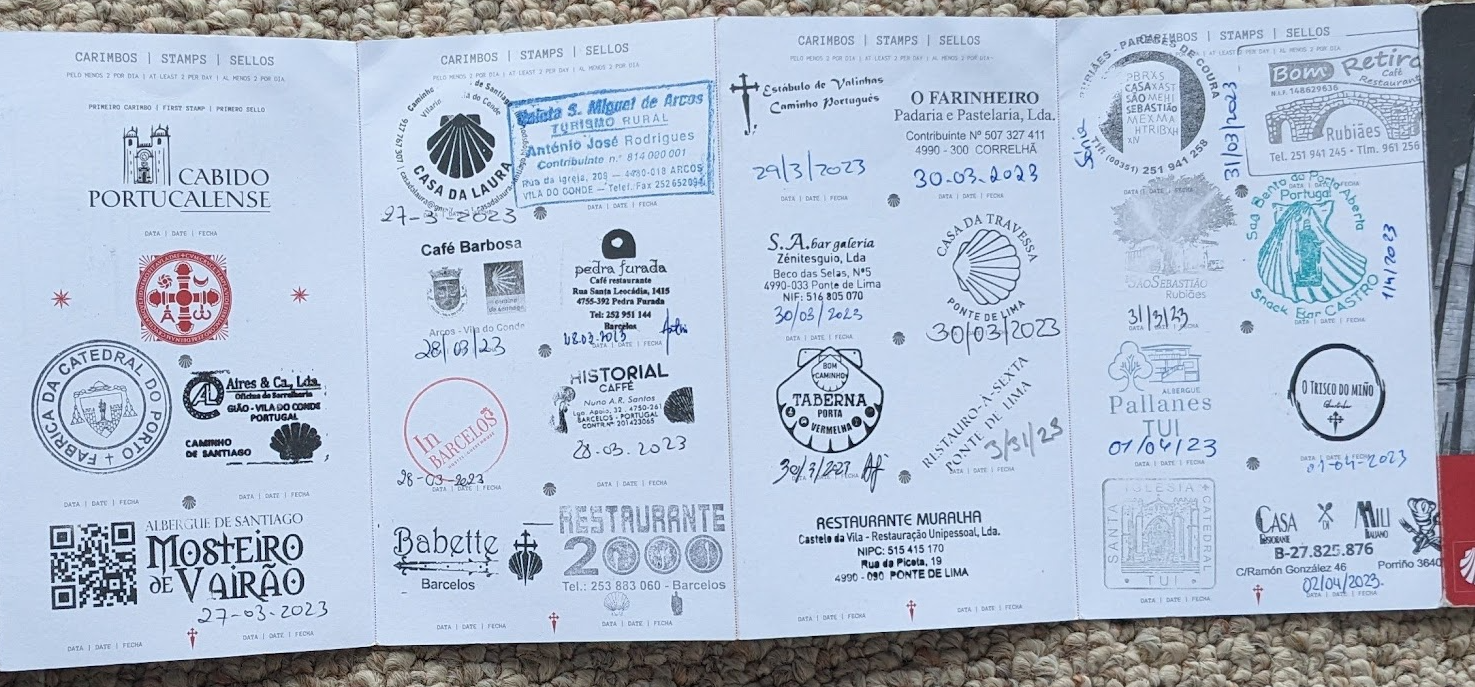
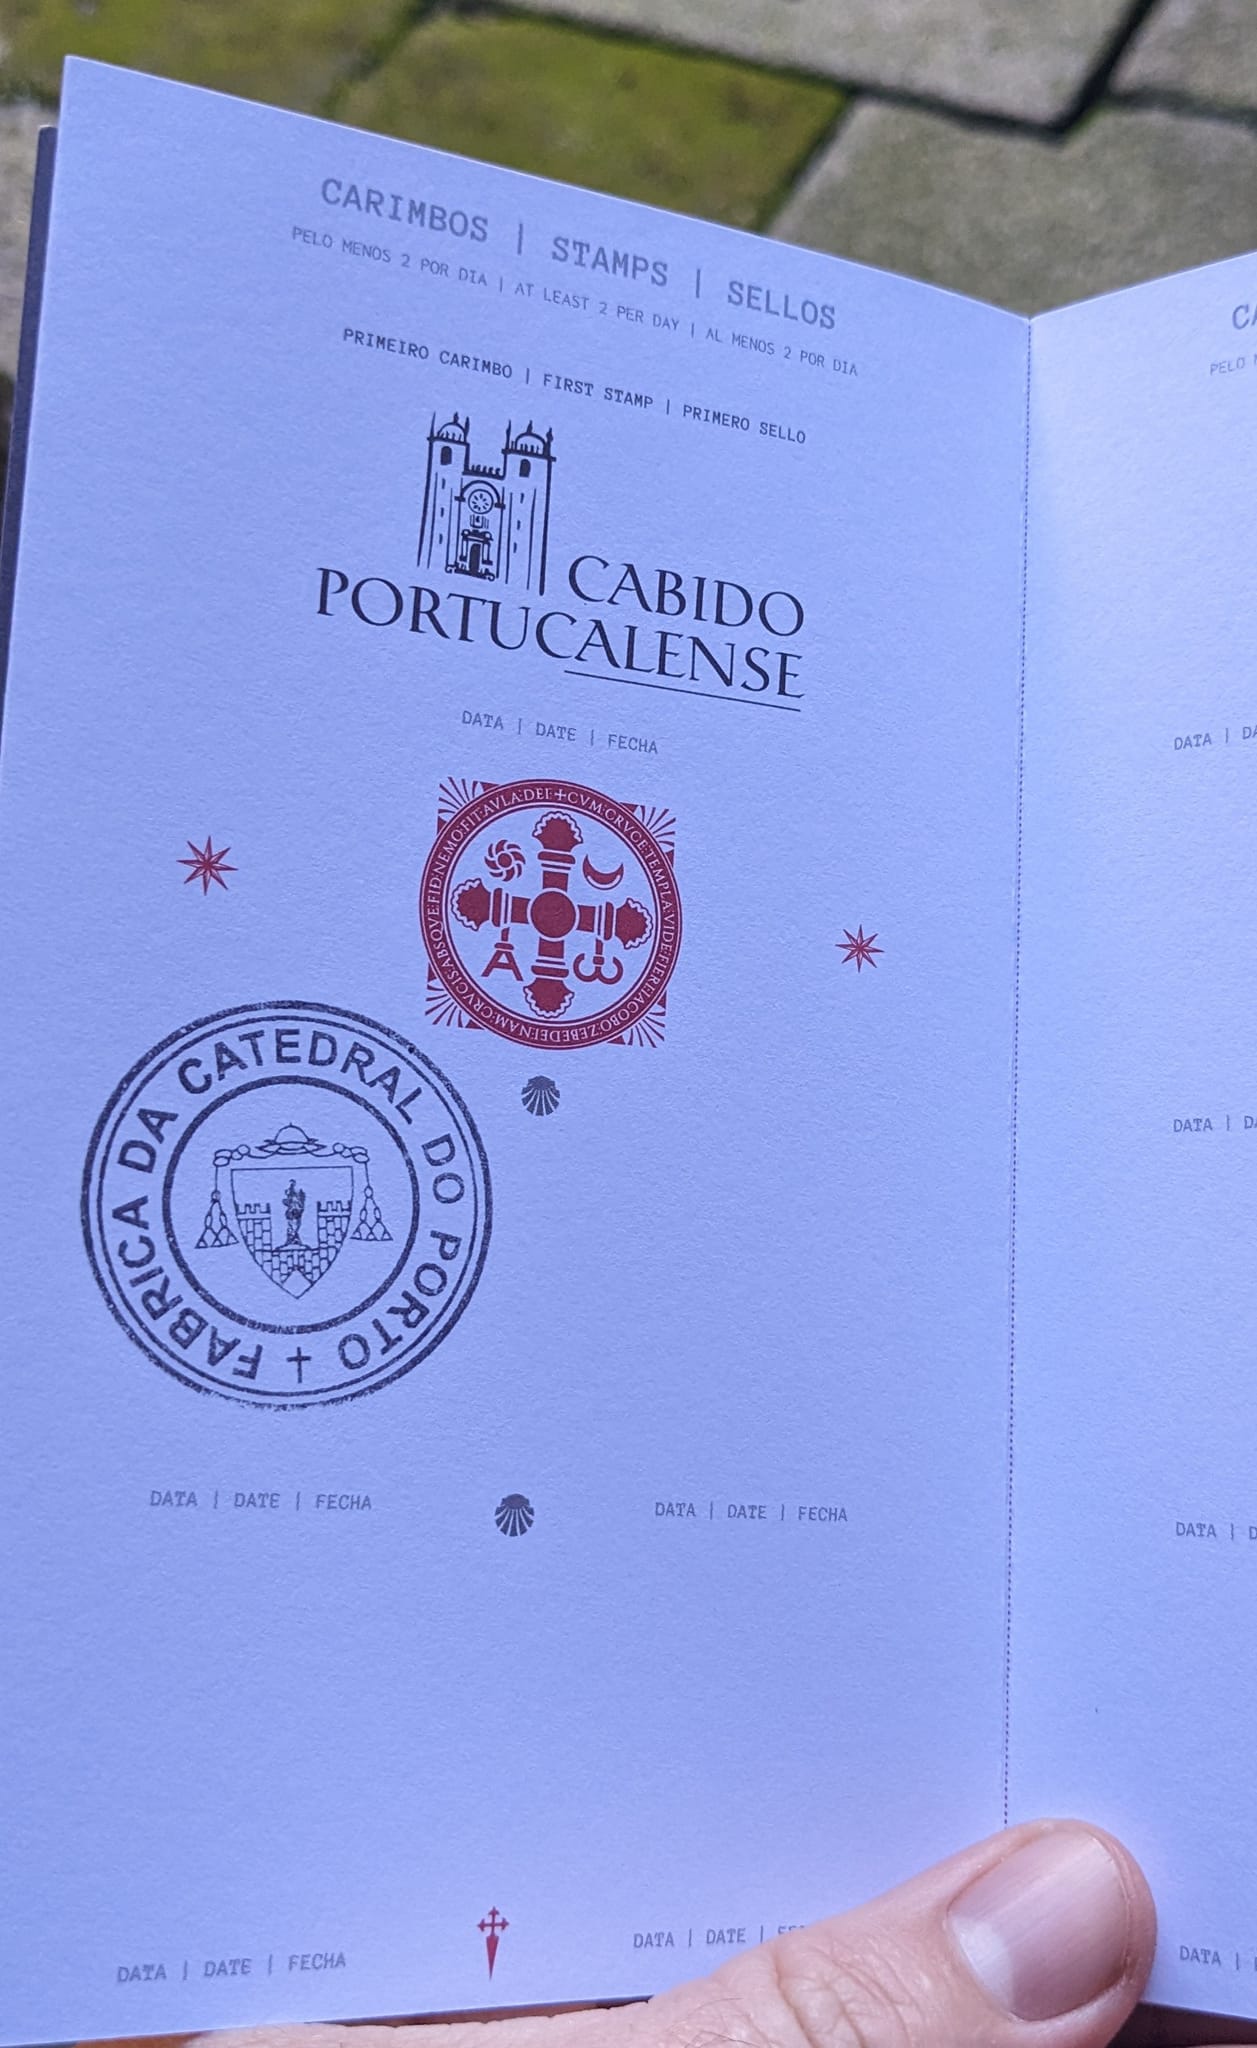
- We waited about 45 minutes, to enter the cathedral and visit the tomb of St. James and get our passport stamped at the cathedral, which seemed like the sensible thing to do, for pilgrims on the Camino.
- HOWEVER, the Cathedral does NOT allow backpacks inside. Thus, we waited 45 minutes to be refused entry because of our backpacks.
- So each of us took turns going inside (by ourselves, without a pack), while the other waited with the backpacks.
- Unbelievably, there is NO passport stamp at the Cathedral itself! Shocking, but true. We asked all over.
- The famous front doors are ONLY open during jubilee years (of which 2023 is not). So instead you enter through the side doors.
- If you want to see the front doors (which are roped off), you'll need to buy a ticket and a tour (which we did a day later).
- The tomb of St. James is under the altar, and there's another 10-15 minute queue inside of the Cathedral to see that.
Here's what TO DO...
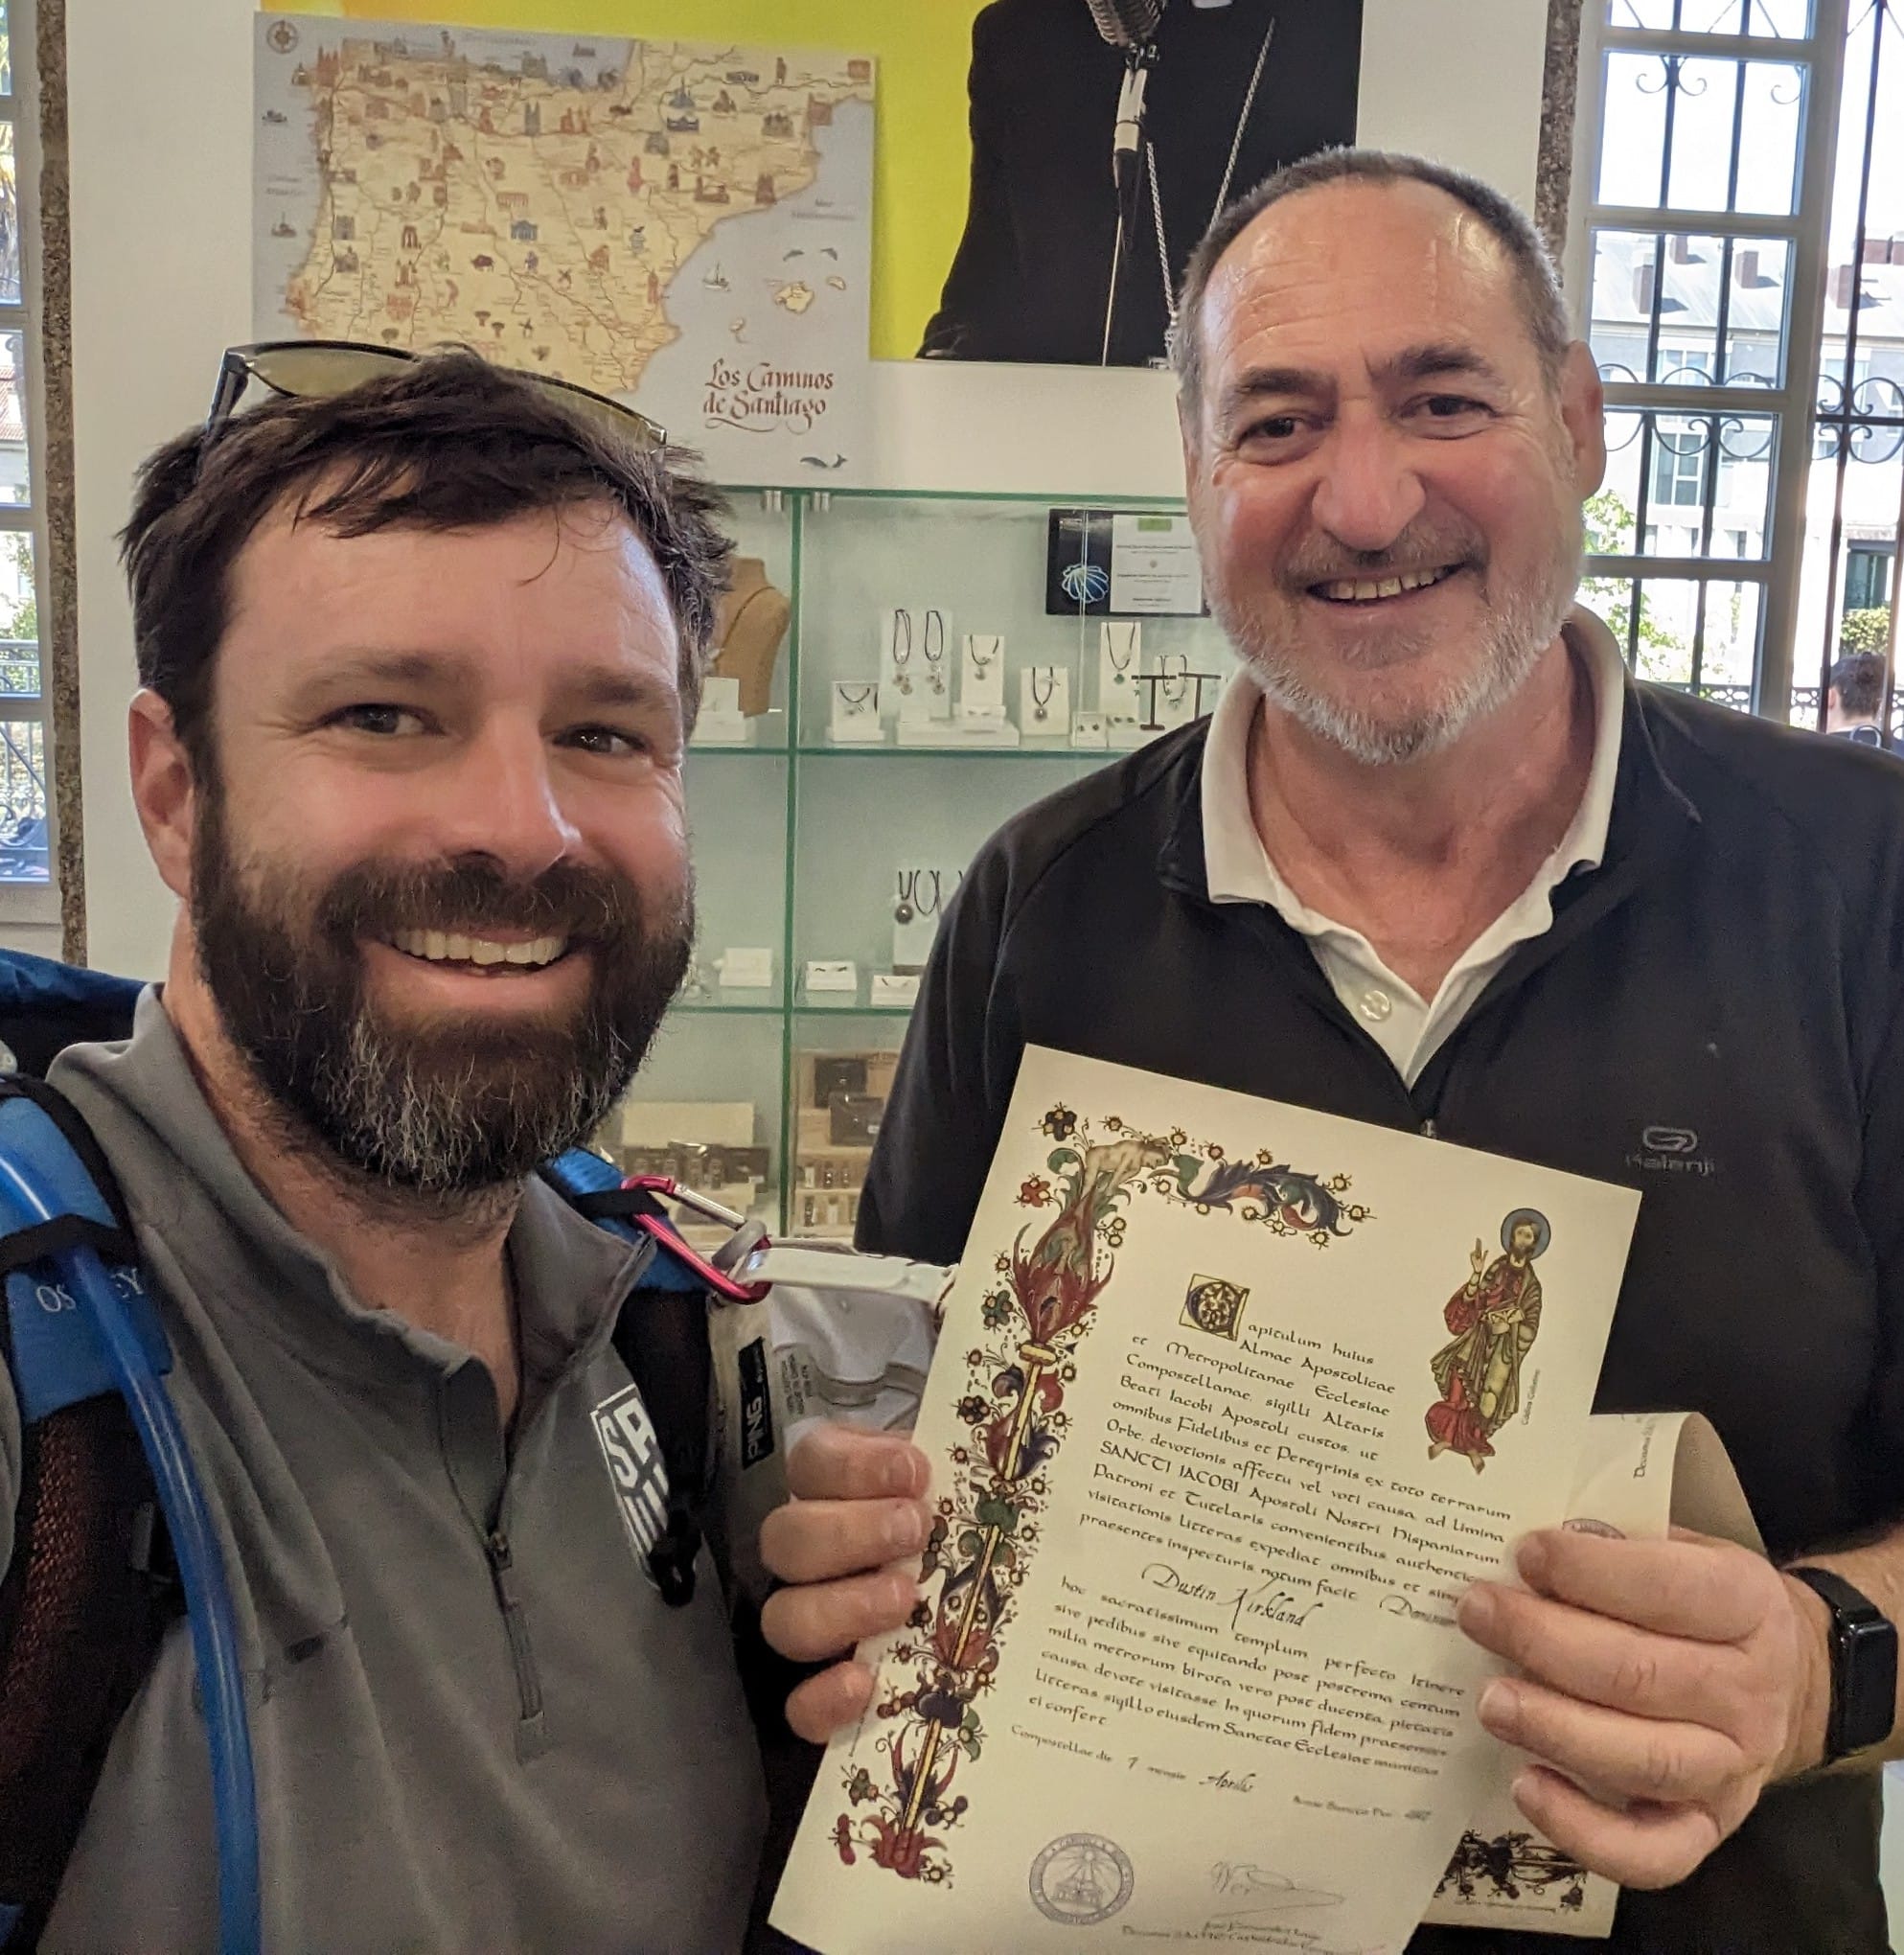
Rather, here's a much better plan... Go straight to the Pilgrim's Office, get your Compostela, then check-in to your hotel or accommodations, drop your pack, clean up, and visit the Cathedral afterwards.
- The traditional end of the Camino is an old, worn stone tile, with the scallop shell, right in the geometric center of the plaza in front of the cathedral.


- After this, go straight to the Pilgrim's Office, where you'll scan a QR code, and complete a short form to register for your Compostela.
- It'll ask you a few things -- your name, your nationality, the starting point of your Camino, and your reasons for embarking on this journey.
- Once you've completed this form (it takes 60 seconds or less), you'll get a number on your phone (basically like pulling a paper ticket at the DMV).
- In the event that there is a longer wait, there's a beautiful garden within the Pilgrim's complex, which would make for a lovely place to relax while waiting for your number.
- Then, there's a line that forms inside the building, for the numbers being called.
- We arrived at the Pilgrim's office at 2pm on Good Friday -- one of the busiest days of the year -- and we waited in line for less than 5 minutes.
- When your number is called, you'll move into a very busy room that looks just like the DMV, with perhaps a dozen or more booths, each staffed by a helpful person who checks your Camino passport stamps briefly, gives you your "final" stamp, and then prints your compostela.
- Optionally, you can also add a second "certificate of distance", and purchase a tube for safekeeping your certificates for a couple of euros.
Also, the
website will say that there's a "Pilgrim's Mass" every day. Which is true, except for when it isn't. There was no Pilgrim's Mass on Good Friday or Holy Saturday (so we didn't get to attend one).
Would I do it again?
Big question...would I do it again? Complicated answer.
I can say unequivocally that I enjoyed every minute of it -- the distance, the landscape, the clean air, the weather, the people, the food, the pain, the gain, the history, the bridges, the cobblestones, the churches, the cathedral, the vineyards, the orchards, the farm animals, the rivers, the streams, the waterfalls -- all of it.
But, at the same time, I just feel that there's so much more to see in the world. While I was raised Catholic and appreciate the history and solemnity, as mostly an apostate, the religious parts of the pilgrimage are perhaps a little lost on me. The cathedral is an unbelievable feat of medieval architecture and the history is just mind blowing, but I don't think I get quite as much out of it as someone doing it for the religious act of pilgrimage.
Moreover, personally, I'm a little more drawn toward the beauties of nature, maybe dotted with some architectural and historical storylines. With limited opportunities to travel and hike for weeks at a time away from family and work, I think I'd probably tackle some other trails on my list first, before making another Camino. But, I'd never say never...
Part 3: Itinerary, Narrative, and Pictures
March 25, 2023, Day -1: Travel
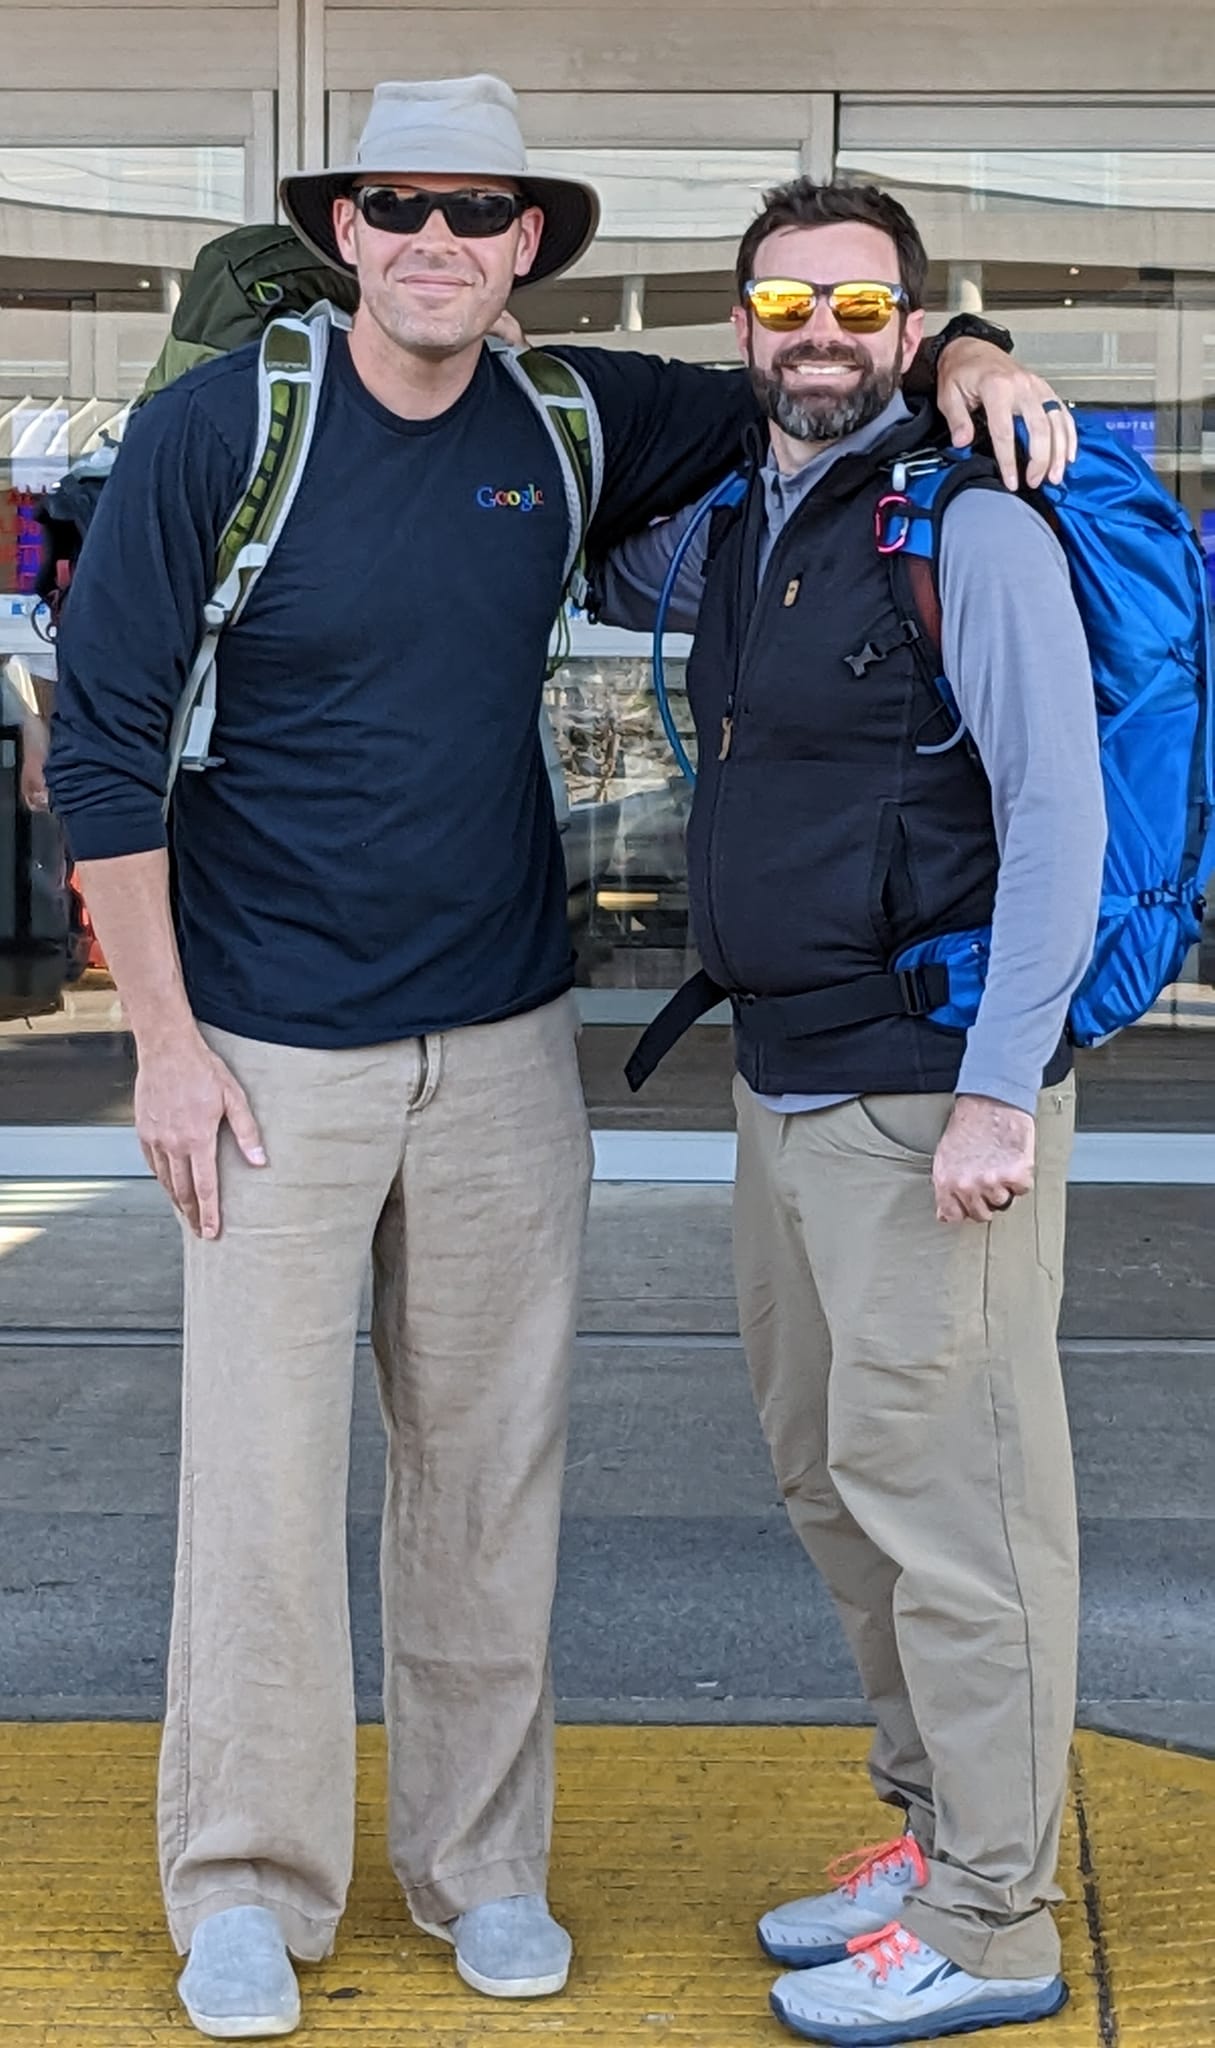
Setting out toward Portugal to walk the Camino. Big thanks to the ladies for taking care of everything back home!
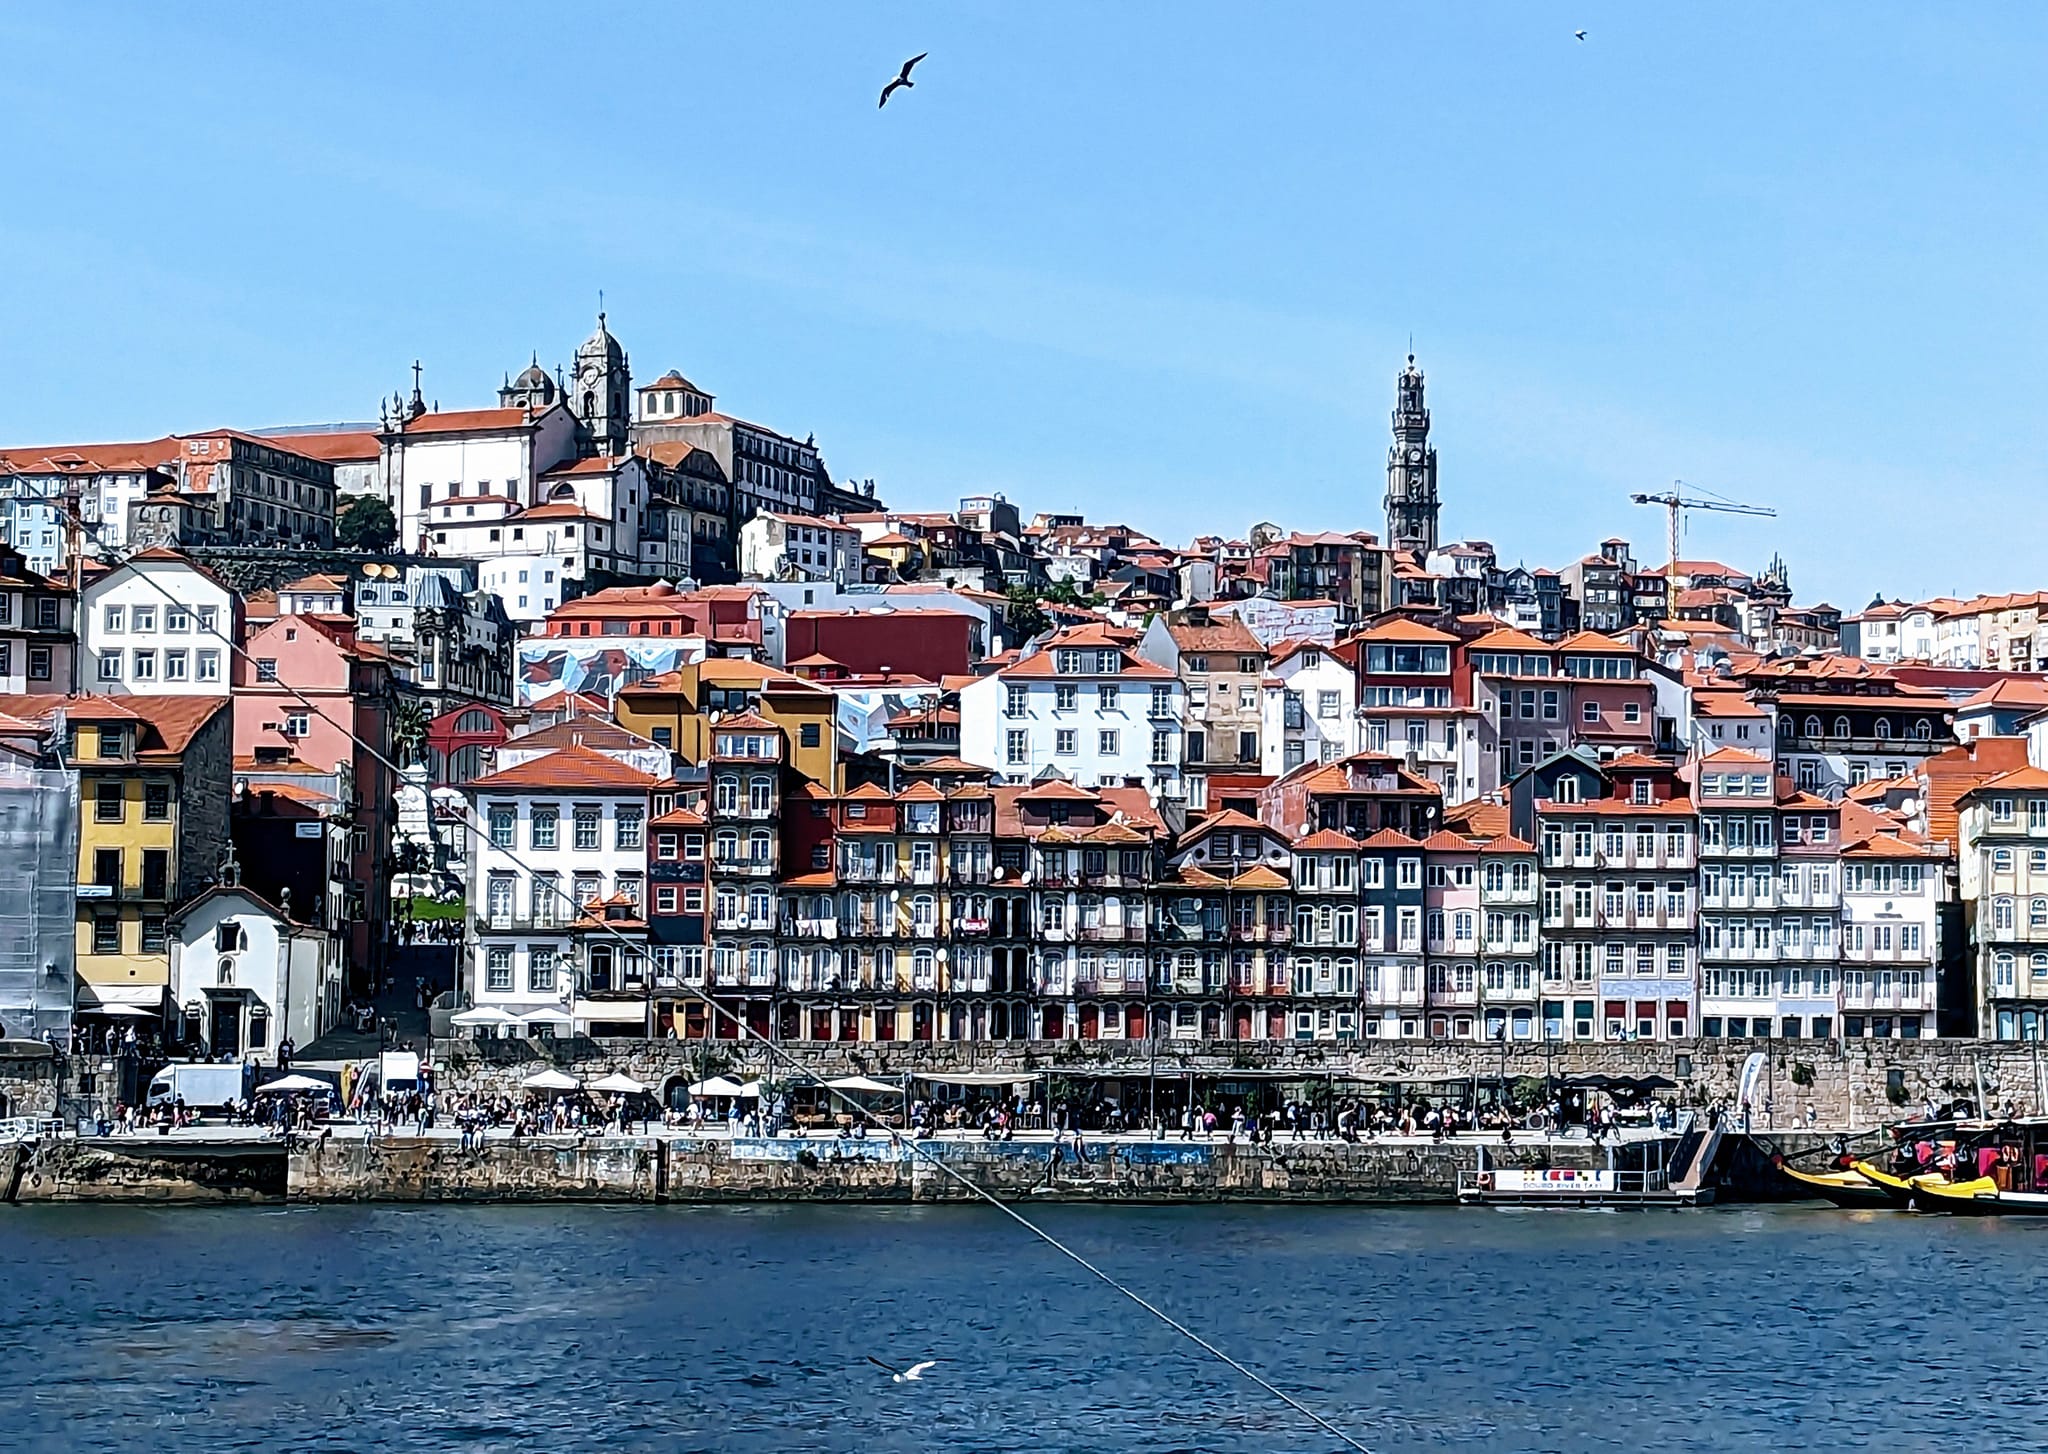
March 26, 2023, Day 0: Arrival in Porto
Let's do this! Made it to Porto, a little later than expected due to strikes in France (merci). Picked up our passport and toured the Porto Se (Cathedral), c. 1100AD. Dinner and beers and dessert port wines around town, and we're back at our hotel, ready to set out on our Camino tomorrow.
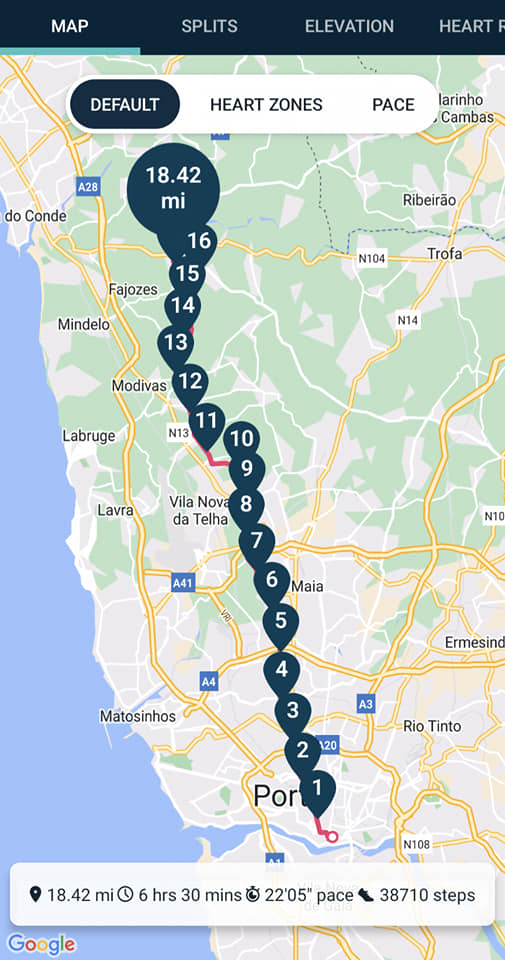
March 27, 2023, Day 1 of 13: Porto to Vilarinho, 18.4 miles
Perfect weather on our first day, sunny and cool in the morning, slightly warm in the afternoon. This will probably be one of our longest days, as it just took a while to get out of the city and suburbs of Porto. The walk was nice, but very urban. Mostly hard, cobblestone streets, lots of lots of vehicle traffic, so not ideal trail conditions. We stopped at the 10 mile mark for beers and sandwiches, then kept moving. We peeked in one aubergue (public hostel for pilgrims) and one other private one, before finding a good match here in Vilarinho. It's not very crowded at all on the trail yet. We've only met 4 other pilgrims on the trail so far -- a young lady from Taiwan, an older couple from France (on their 15th Camino) and a guy from Brazil. We seem to be very early in the season.
March 28, 2023, Day 2 of 13: Vilarinho to Barcelos, 18.2 miles
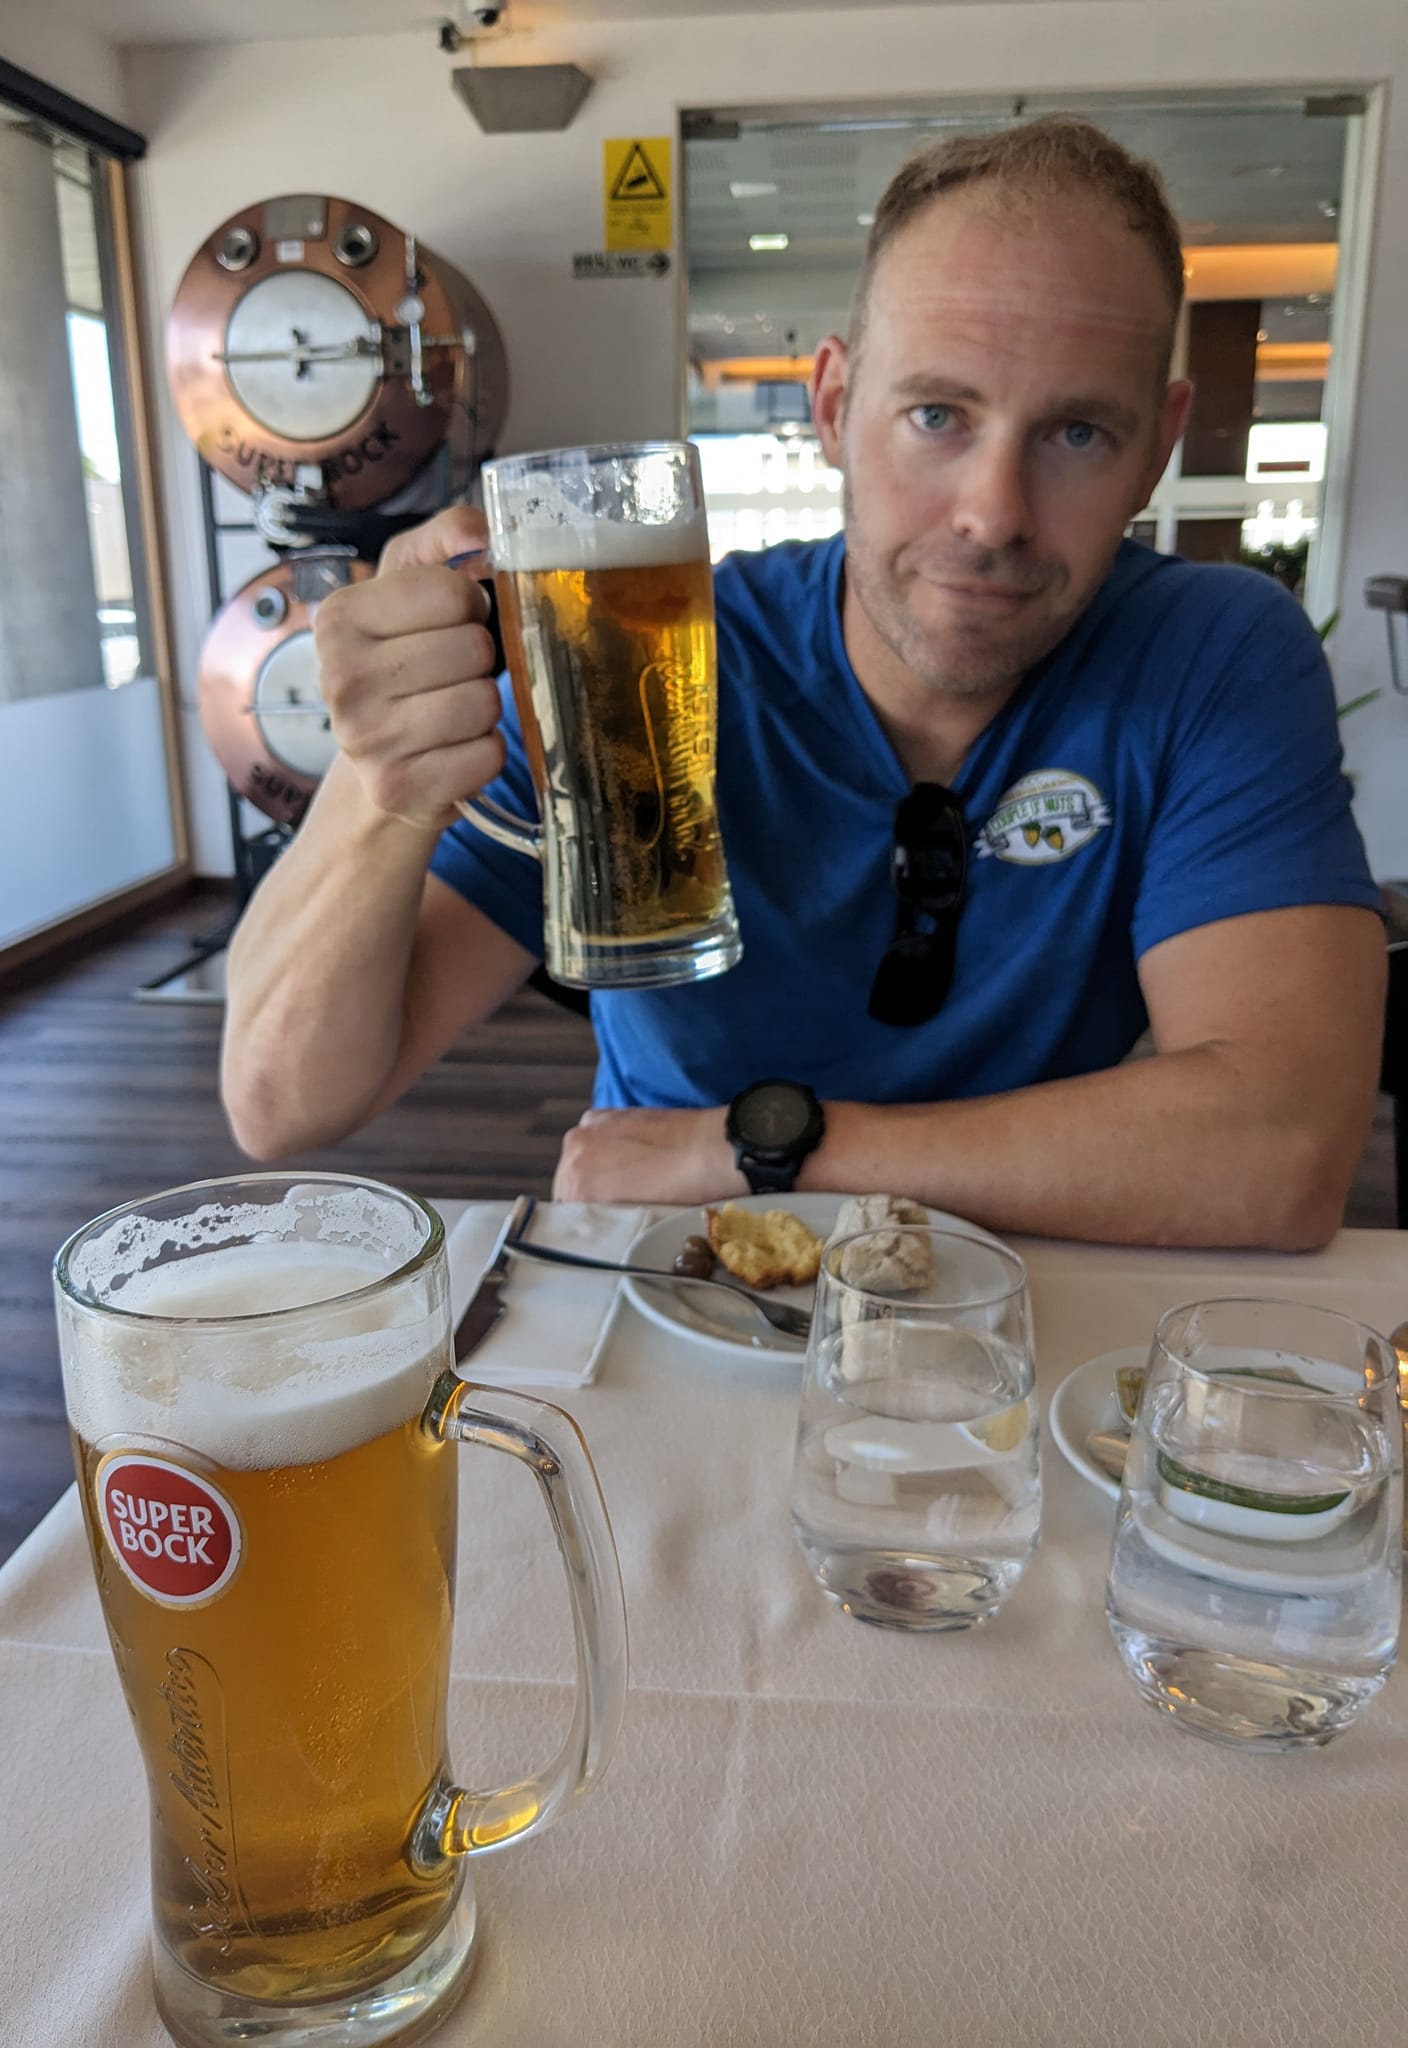
Another big day, 18.2 miles, some rolling hills, from Vilarinho to Barcelos. It finally feels like we are out of the city and into the countryside. About half of today was about 2/3 pavement, 1/3 trails. We met about 10 other pellegrino's today -- a Brazilian, a Portuguese, 2 Czech, 2 Swiss, 2 Danes, and 2 Canadians. We crossed three different stone bridges built about 1000 years ago (possibly incorporating structures from the Roman era 2000 years ago). Barcelos is our destination for the night, a classic medieval village and home for weary pilgrims for a millennium. Like them, we kicked off our shoes and enjoyed cold beers, delicious wine, and good food. Bom cominho!
March 29, 2023, Day 3 of 13: Barcelos to Sao Simao, 13.5 miles
13.5 miles, from Barcelos to tiny vineyard outside of Sao Simao. Best day on the Camino so far, by far! Much shorter day, we walked a little over 13 miles, mostly on dirt trails through farms and groves and vineyards. We saw a few more pellegrino's today, perhaps a dozen, including a few of the same from the day before. We've covered a few different miles with two different mother/daughter pairs, one Canadian and the other Danish. All of us are more or less in the same cohort, on roughly the same schedule. Our first choice of lodging was totally booked and so we walked an extra couple of miles to our second choice and grabbed the last room. As it turned out, it was an awesome result, as we spent this evening at a hostel within a vineyard, drinking all the wine we could from this vineyard, and eating a communal meal with the other pilgrims here. We shared a table with our Canadian friends, as well as some Brazilians, Germans, and Portuguese. Wonderful day, even better night.


March 30, 2023, Day 4 of 13: Sao Simao to Ponte de Lima, 8.5 miles
About 8.5 easy miles to Ponte de Lima. Absolutely wonderful day. Seems like we're finally done with walking along high traffic motor highways and onto trails through fields, farms, vineyards, and orchards. We crossed several stone bridges built by the Romans, reinforced and then widened in the middle ages. These bridges are 1000 to 2000 years old. Spectacular. Nice, easy day, cool, fair weather, good breeze, cloudy and not too much sun. The cork oak trees are beautiful, and some of these olive trees have been growing since Roman times.
March 31, 2023, Day 5 of 13: Ponte de Lima to Rubiaes, 12.3 miles
Ponte de Lima to Rubiaes. Best day of walking so far! A little over 12 miles but the most elevation gain we should see over the entire hike, all in all really not that intense though. We were on beautiful trails and dirt roads for the vast majority of the day. The pellegrino traffic has picked up considerably, now seeing a few dozen pilgrims per day, plus mountain bikers. We've very quickly gone from walking up to our hotels and just getting a room at the end of a long day, to having to have a reservation a day or two in advance. We met our first Americans all week -- a trio of retirees from Rhode Island. There were some amazing waterfalls and mountain streams, and lush, moss and fern covered walls, in addition of course to the vineyards, olive trees, orchards, and cork oaks. The ground was a little moist, but we generally missed the rain again today. A few more Roman era (1st century AD) bridges and roads and water fountains, and a church built in 1295 that is a national monument in Portugal.


April 1, 2023, Day 6 of 13: Rubiaes to Tui, 13 miles
Really, really nice day, about 13 miles, all the way across the border from Portugal into Spain. We got our first taste of slightly damp weather. The forecast was 'rain' but it was more like a very light fog or light drizzle. The last town at the border, Valenca, was a beautiful medieval town with a proper wall and castle and moat. We walked the ramparts and stumbled on a Renaissance festival and/or passion of the Christ where I had the best crepe ever, cooked over an open flame. We're staying in a hostel outside of town though we walked a few miles back into town to have drinks and dinner. I played goalie for a couple of kids in a Saturday night futbol match and kept a clean sheet (like 9 saves or so, if I do say so myself)...
April 2, 2023, Day 7 of 13: Tui to O Porrino, 10.5 miles
A little over 10 miles from Tui to O Porinño. Really hard to believe, but the journey is well over half way over. We gained a full day by walking extra our first 2 days, so we'll probably spend an extra day at the end in Santiago de Compostela. Today's walk from Tui was very, very, VERY different. There were over a hundred at least pellegrino's setting out from Tui for Santiago. The Camino was packed with pilgrims. Very different. It seems that the pellegrino traffic picks up considerably in the last 100km or so. This was also our first day out walking before sunrise, which made for some great pictures. In any case, we had a nice short walk today, along an ancient, 2000 year old Roman road, across a couple of Roman era bridges, into the town of O Porinño, where we had the best meals of our journey. Because our distance was shorter (and the time change moving into Spain) we arrived much earlier, and enjoyed the best meals of our trip so far. We did some laundry, had a nap and a siesta, and then a great evening too. Hard to believe we are wrapping this up so soon.


April 3, 2023, Day 8 of 13: O Porrino to Redondela, 9.9 miles
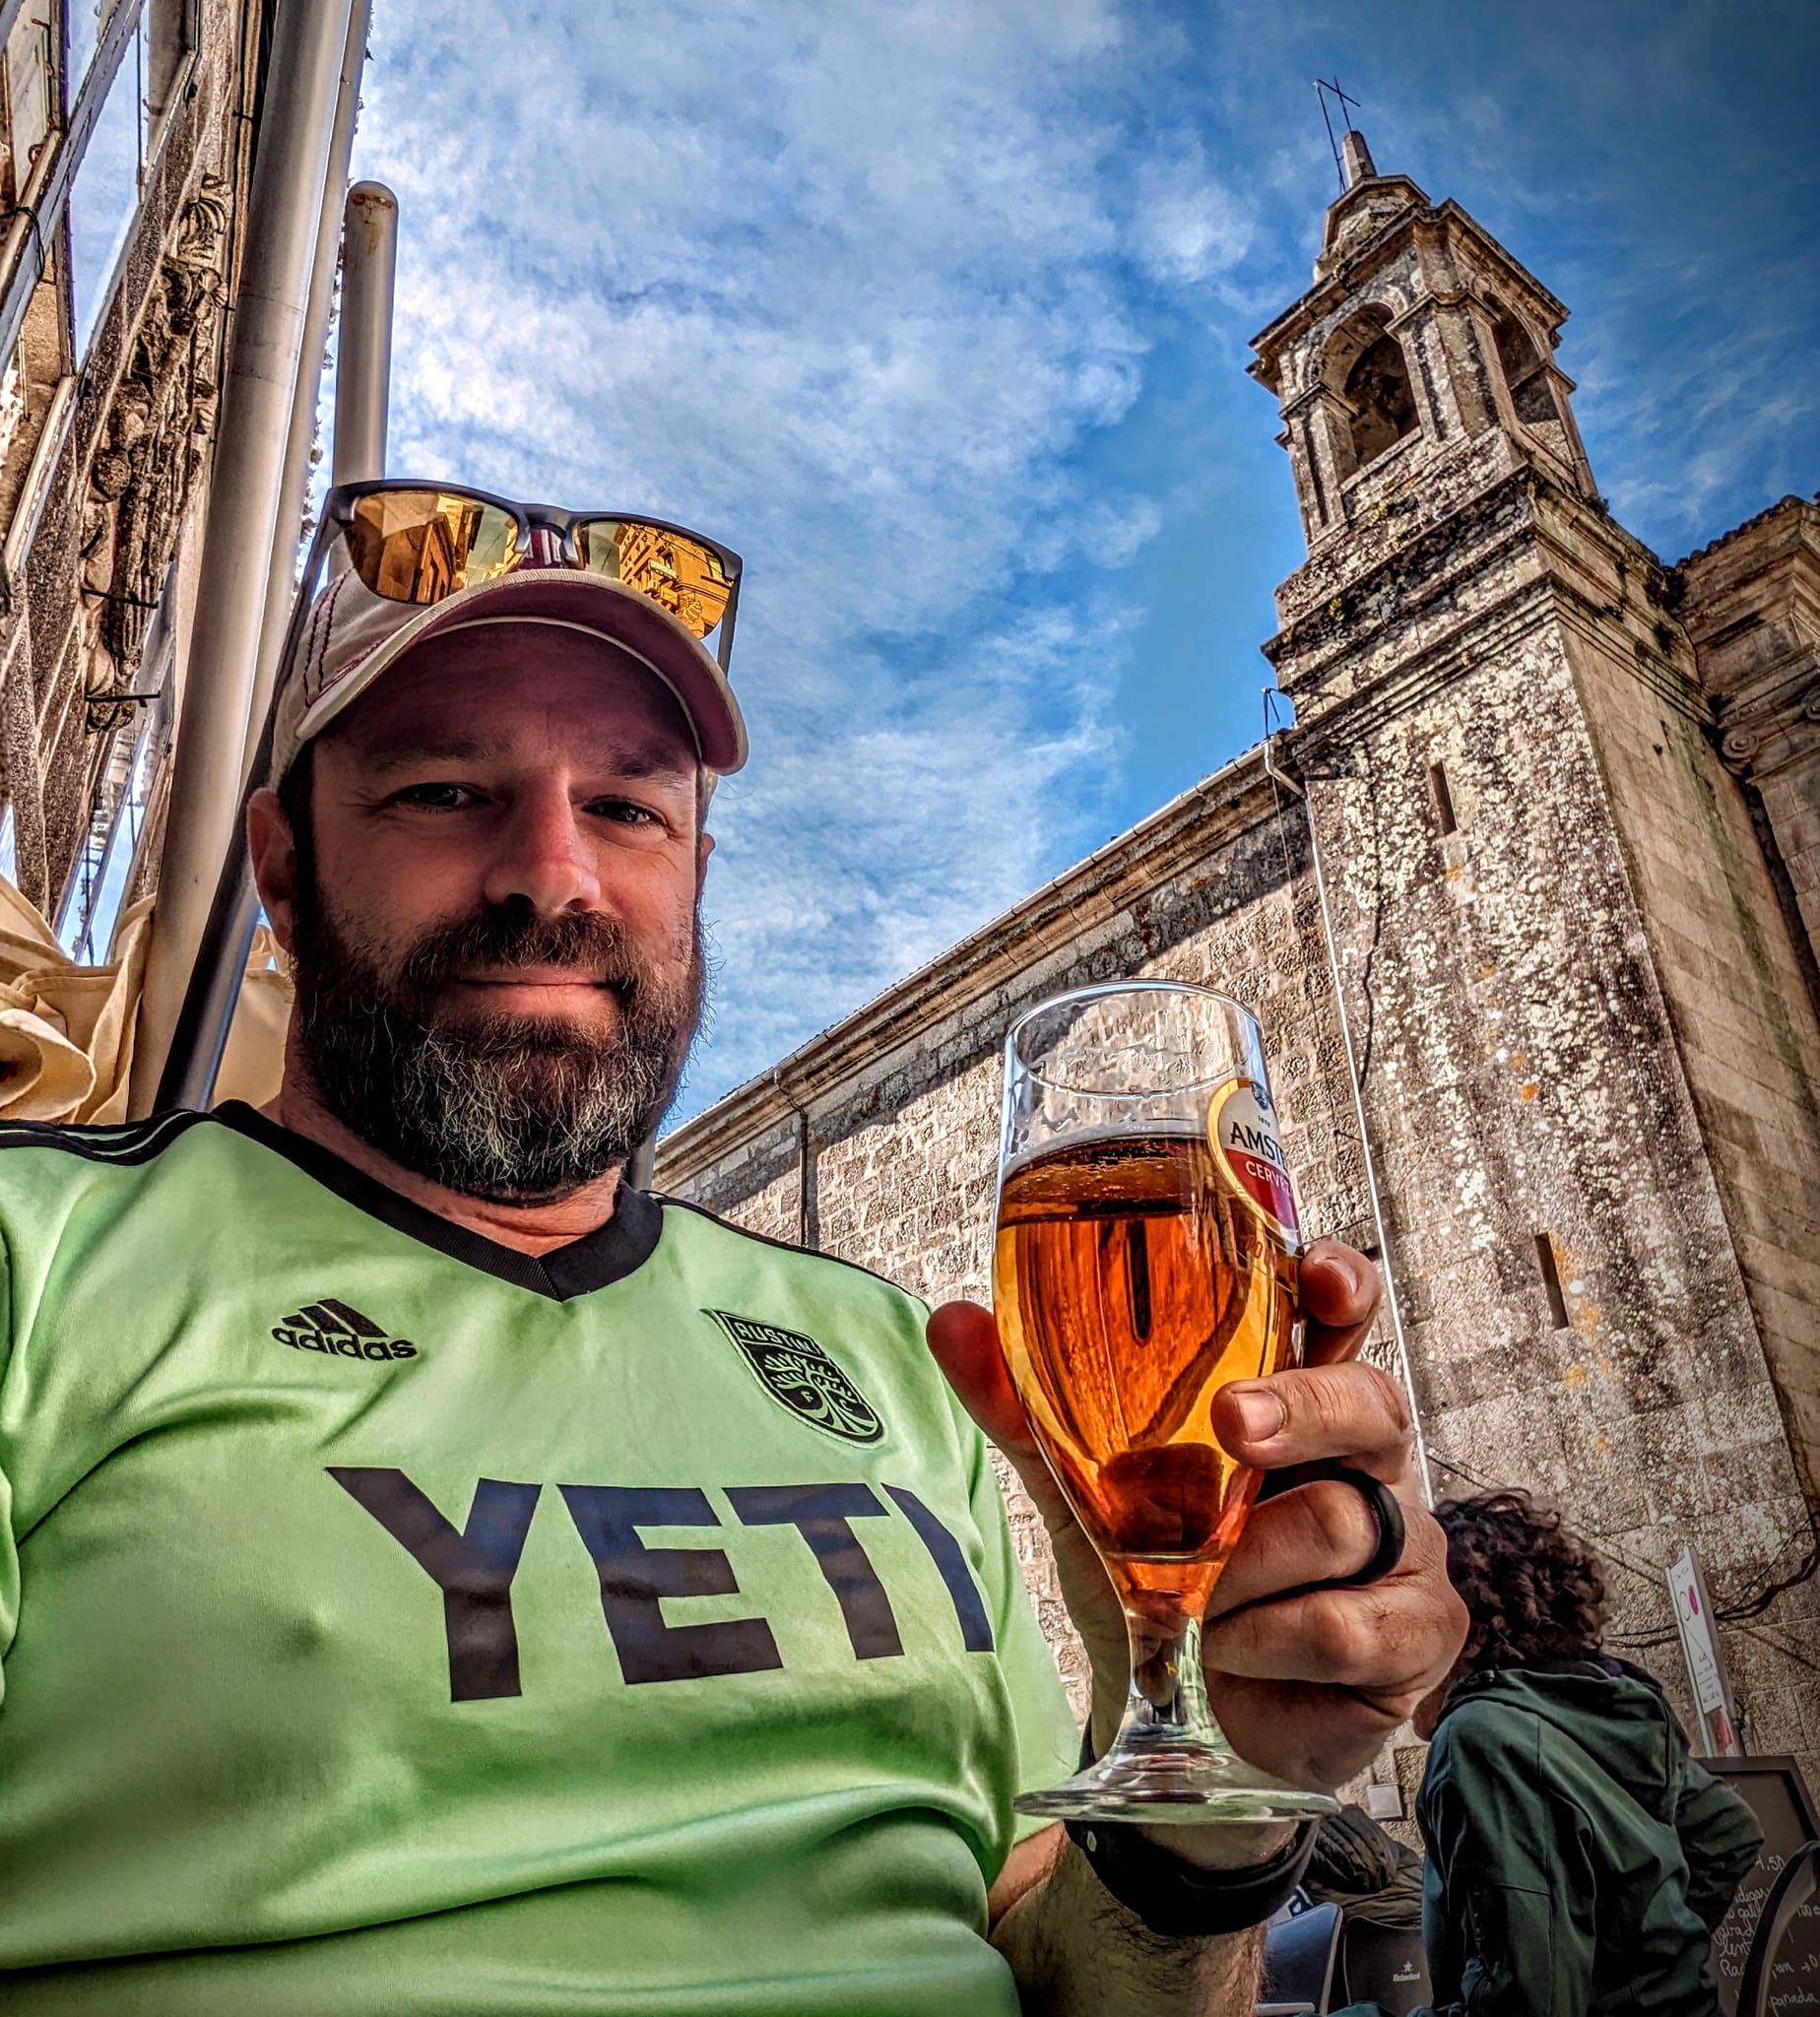
Just about 10 miles today, from O Porriño to Redondela, and then another 4 or so miles exploring the town and area. The trail started out somewhat crowded but thinned out a bit mid morning. We climbed about a 1000 foot hill and back down towards the end of today's walk, which afforded some beautiful views of the valley and the water. Our hostel for the night is right next door to a small cheese and meat and meticulously curated bottle shop, where we enjoyed charcuterie plates twice today, plus a delicious Palo Cortado sherry, a tawny port, and a couple of interesting beers. Very enjoyable day!
April 4, 2023, Day 9 of 13: Redondela to Pontevedra, 14.2 miles
From Redondela to Pontevedra, it was a solid 14 mile walk, with a few more hills than we were expecting. Still, very fair weather and a really beautiful day. We opt for a couple of slightly longer, slightly more scenic "complementario" routes, hoping to avoid some of the crowds. Speaking of...it's crowded now. The Camino is a highway of pilgrims trying to make it into Santiago for Easter. Of course we walked along the ancient Roman XIX road (yes, the Romans numbered their major roads across Europe like Interstate highways in the US), and several Roman era bridges, including a beautiful one in Arcade. We also had a magical experience at a bakery in Arcade recommended by our butcher friend a town or two back. In Pontevedra, we visited an extremely well curated art museum with several Velasquez, Goya, and other Spanish masters. But the antiquities really shine, with a couple of gold and silver hordes from the area, dated to almost 3000 years ago. Lots of history and natural beauty today.


April 5, Day 10 of 13: Pontevedra to Caldas de Reis, 14.2 miles
Roughly 14 miles, from Pontevedra to Caldas de Reis, mostly flat with a couple of minor hills, beautiful, fair weather, cold in the morning, warm in the afternoon. The Camino for traffic is in full force from here on in. Hundreds upon hundreds upon hundreds of pellegrino's now cover the trails. Young, old, native, foreign, walking with kids, with dogs, with backpacks and without, and a few annoying groups who think that you want to listen to their Bluetooth speaker for 4 hours. Everyone is on the trail now! Most of today was spent on nice trails or small alleys and away from highways. Caldas de Reis is an interesting little town, surrounding a network of hot springs which have been in continuous use since the time of Ptolemy and the Romans. We dunked our feet a public hot spring that has served pilgrims for literally a millennia!
April 6, Day 11 of 13: Caldas de Reis to Padron, 12.2 miles
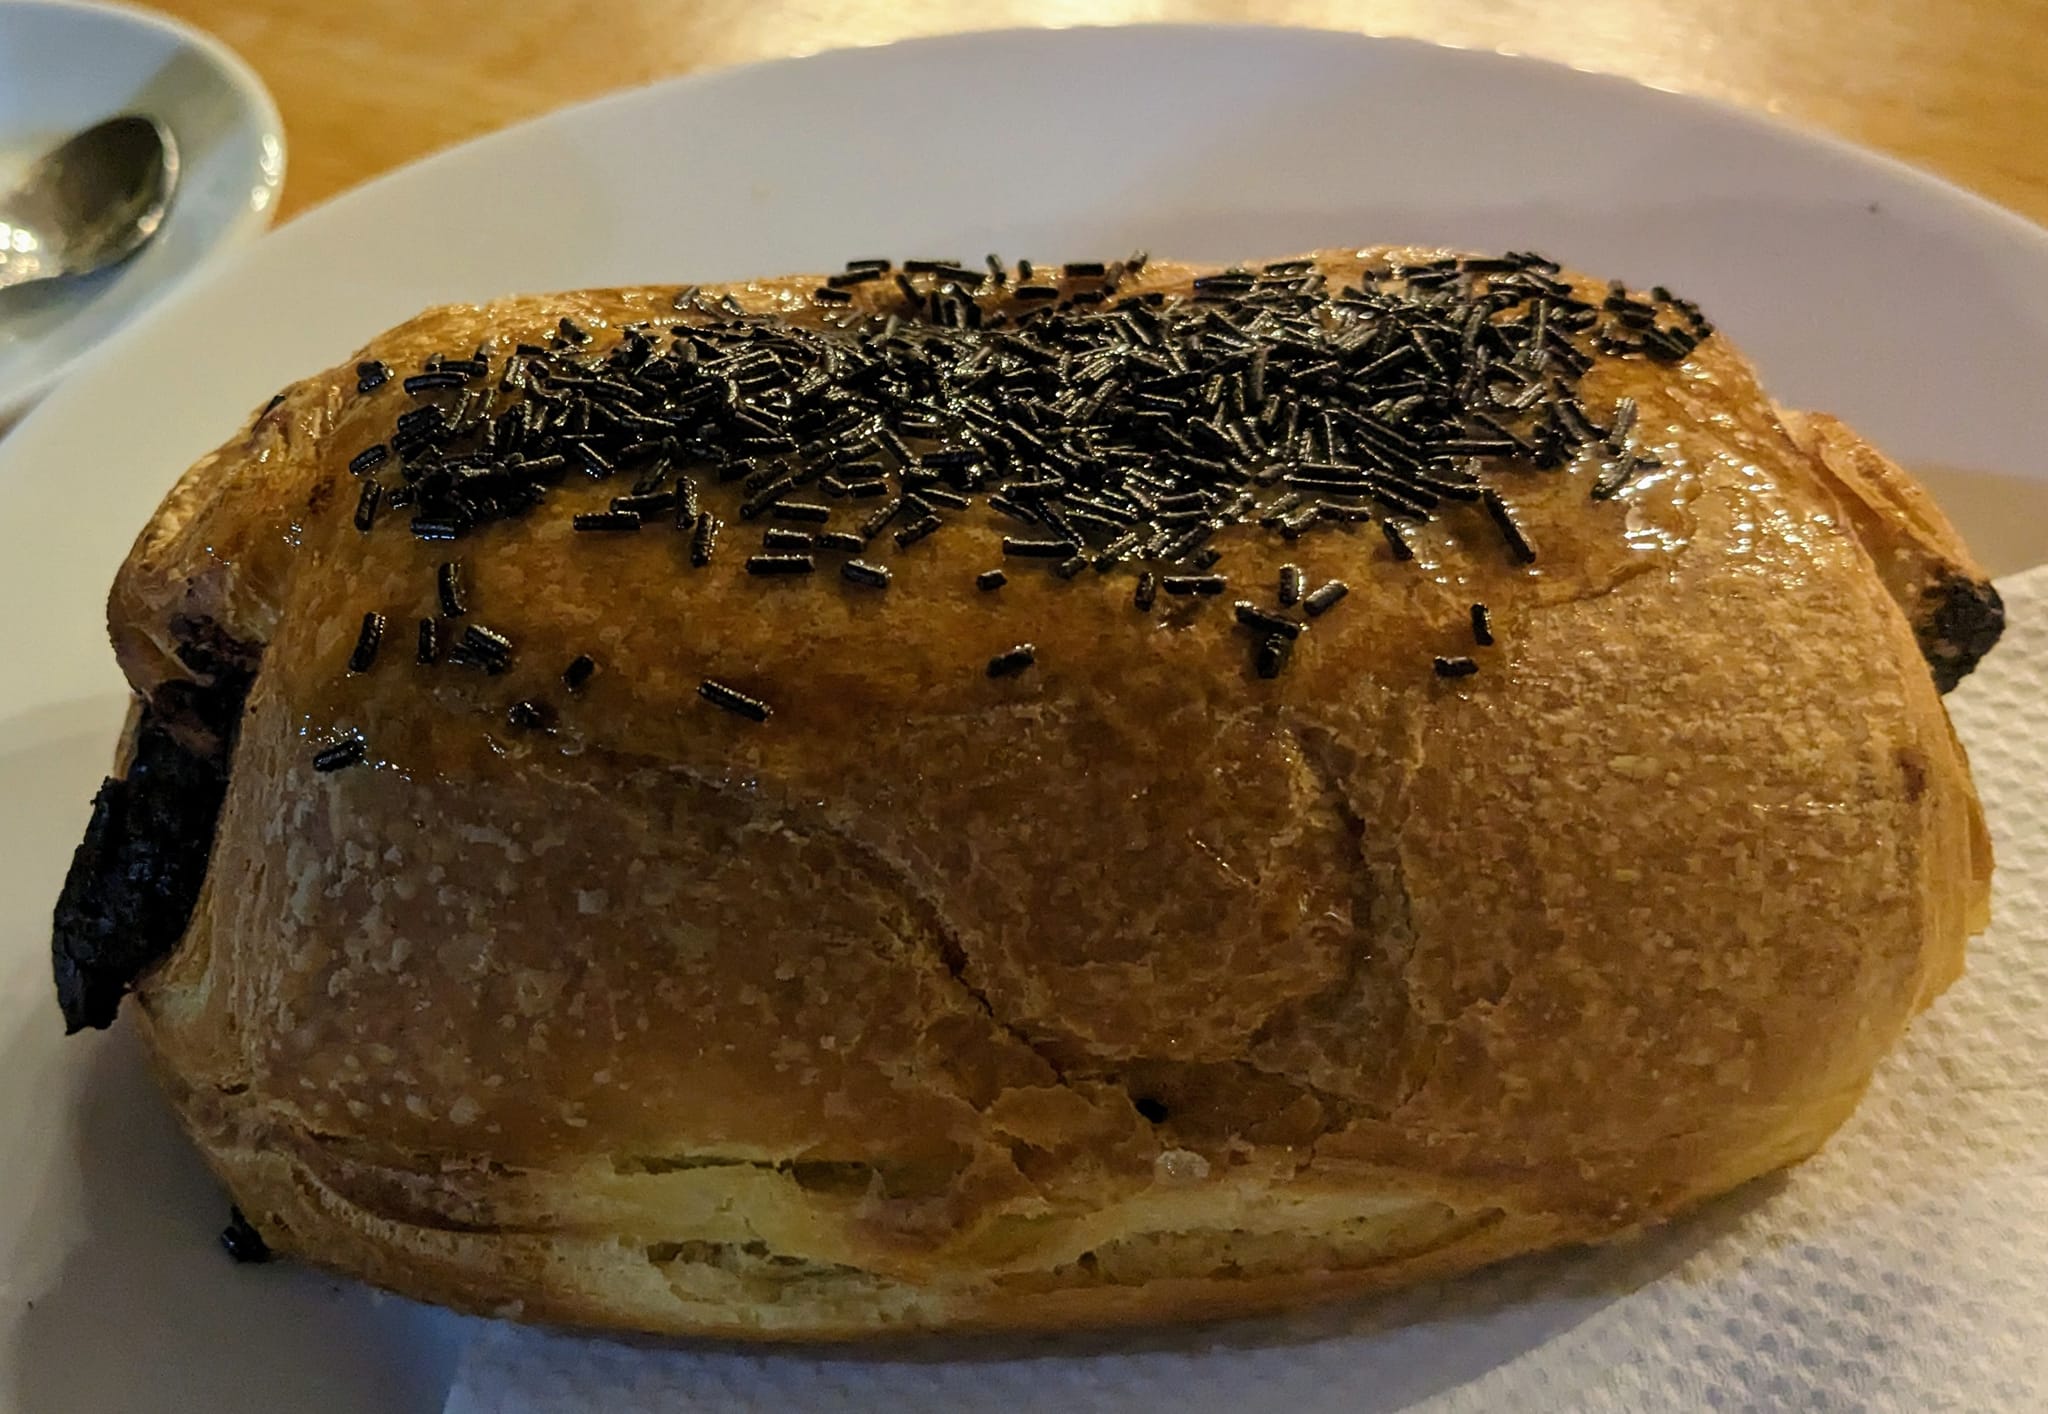
Second to last day hiking, we covered a little over 12 miles from Caldas de Reis to Padròn today, mostly flat terrain, and very fair, favorable weather. Crowds are heavy -- according to the Camino website, about 1500 pellegrino's are arriving per day. We enjoyed some nice time in the forest, along trails and streams, the usual Roman roads and bridges of antiquity, and plenty of sunshine. The food and drink of Galicia are most delightful, from the sweet pastries for breakfast, breads and meats and cheeses for lunch, and the many varieties of fermented beverages. And the locals are just so incredibly friendly. Every proprietor and shop owner and bar tender treats you like you are the single most important person in the world. In fact, we had drinks this evening at Pepe's place in Padron, where every patron gets a giant bear hug and a kiss on the cheek from Pepe, after you sign his book. This is timeless and precious.


April 7, 2023, Day 12 of 13: Padron to Santiago de Compostela, 17.5 miles
A long, hard uphill final day of walking, 17+ miles from Padròn to Santiago de Compostela, our destination. We left our albergue well before dawn, knowing that we had a tough day ahead of us, and a lot of pilgrims doing the same walk, expecting to arrive in Santiago on Good Friday in time for Easter. Our earliest start of the whole trip, it was cold and dark when we started, but also quiet and beautiful and less crowded. We saw both a full moon set and a sun rise, and zipped through trails and small towns. We stopped once for a brief breakfast and picked up sandwiches to go, which came in handy 10 miles later. Once the sun came up, it got hot quickly, and the crowds picked up too. The last few miles into the city were less scenic and more urban, but ticked away pretty quickly. Upon arriving, we weren't sure if the protocol, so we went straight to the cathedral where we waited in a line for a half hour and were turned away because backpacks aren't allowed in the church. So we each took turns, watching one another's packs outside, and doing a quick tour of the church. Then we went to the pilgrim's office a few blocks away and learned that we didn't even have to visit the cathedral to claim our certificate, the Compostela, but we did anyway, so..bonus points? We paid a few euros to get our Latin inscribed parchment (pretty cool actually), and then checked into the hotel, and cleaned up. Then we headed back to the cathedral to actually attend the "pilgrim's mass", which happens every day, and they read the names of all the pilgrim's that arrived that day. Except when we got there, we were told that "every day" doesn't include "today" because today's Good Friday, and there's no mass. And every day doesn't include tomorrow either. Or Sunday. So come back on Monday, two days after you leave. At this point, the religious part is lost on me, but it was a mind clearing, spiritual journey none the less. Anyway, amazing walk! Spectacular weather. Great company. Delicious food. Good people. I'm tired, but refreshed. Challenging, but rewarding! Exhausted, but energized. Appreciative of this experience, but also ready for home with my girls. I'll have a bit more to say later in retrospect, but for now, "bom comiño!"


April 8, 2023, Day 13 of 13: Day of Rest in Santiago de Compostela
This is the first day in over two weeks that we haven't had to pack our backpacks and check out of our lodgings and head to the next town. Rather, we enjoyed a nice day touring the beautiful town of Santiago de Compostela, starting with the museum at the cathedral, which included 4 levels of history around the construction of the structure, art, and artifacts. After that, I think I had the most unique tour I've ever experienced, period... We took a guided tour (albeit entirely in Spanish), whereby we spent almost 90 climbing and crawling around THE ROOF OF THE CATHEDRAL. Yes, you heard me... There's a tour where you basically climb out of a window and look at the cathedral from every possible angle, on the damn roof! This was simple indescribable and incredible. Maybe a little unnerving and uncomfortable at times, but a heck of a lot of fun and a one of a kind experience, never to be missed. The roof was renovated in 2021 and this experience is only recently available. Tomorrow morning is an early bus ride back to Porto, then I fly back through Amsterdam to my girls, and I'm very much looking forward to being home. I'll post again a bit more about the logistics of the trip for those considering something like this, and maybe something a little more introspective about what I found along the way. The way.


April 9, 2023, Day 14 of 13: Back in Porto for a day
Just a short bonus post...we spent Easter Sunday commuting by bus from Santiago back to Porto. It was kind of amazing to watch the 12 little towns we spent our night tick by, about every 15 minutes by the highway. 3 different times the highway touched the Camino and pellegrino's were obvious with their backpacks and very determined walks. Porto was a buzz with Easter festivals and activities. Corey and I had a nice meal and a couple of fantastic ports, which put a nice finish on a great trip. We even made our way back to the Porto Cathedral, to the start of our journey and the mile marker that says "248 km to Santiago." To the next pilgrims, bom comiño...
That's all, folks! I'll leave you with this one...bom caminho, good way, buen camino!
:-Dustin